HOW TO POSTS: LIGHTING AND COMPOSITION
indoor macro photography lighting tips
the best macro lighting set-up
Here's what happened. I wanted to give you indoor macro photography lighting tips and using only a single strobe flashgun) as the light source. This article will give you that and an extra valuable tip along with that too. In addition to a single hot shoe mount flash also used a overhead room light and got an interesting photo as a result. Has that ever happened to you before? You try to take use a certain photography technique, things don't go as planned, and you get a really different photo, almost by accident.
Check this out! I got a very interesting photograph resulting from overhead lighting. That's usually the worst thing to use-overhead lighting that is. Light from directly above is frequently undesirable to use with macro photography.
how to setup INDOOR macro lighting with flash
I chose a glass with hydration beads as an interesting subject to practice on for this little exercise in using a strobe for macro. These water beads are also called hydro beads, hydro orbs, polymer beads and gel beads. What makes them unique is the start as tiny hard plastic balls and grow up to 200 times their size when placed in water.
I chose them because I thought they'd make a good subject. I was disappointed with the first photo, so I heeded my own advice and did a little experimenting.
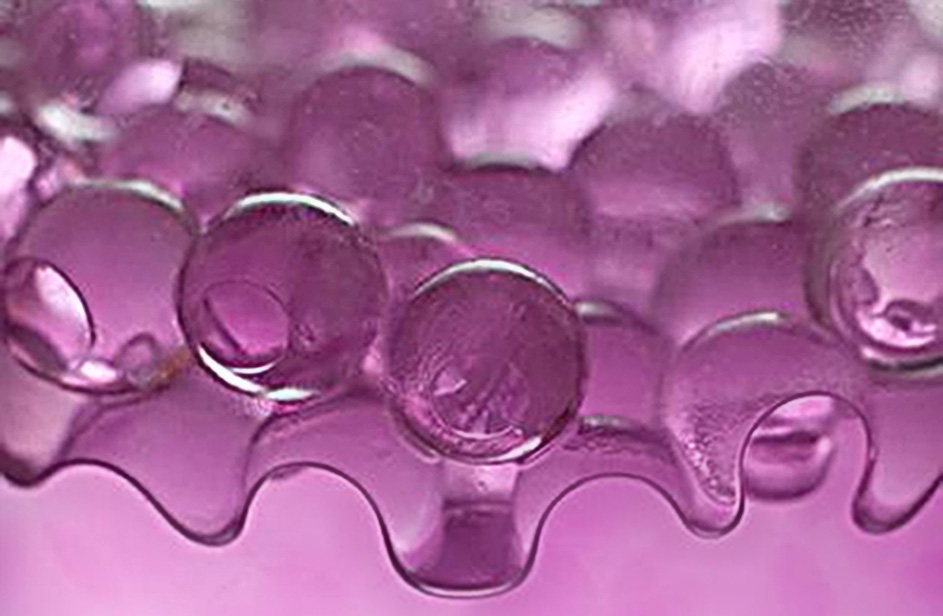 Water Beads
This was a very simple macro photography setup. The bottom surface and the background were simple pieces of white foam core/cardboard. The camera was mounted to a tripod set at the same height of the table.
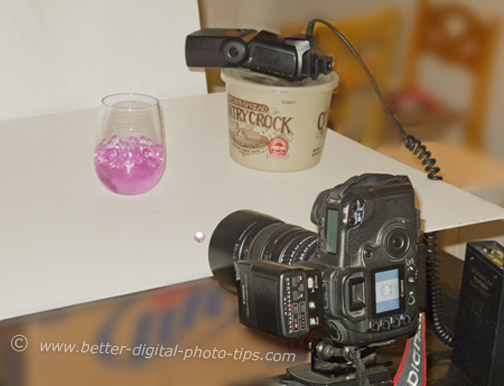 Simple macro lighting setup
The photo of the set-up above was taken with my point and shoot camera and it's pop-up flash, so you can't really see the effects of the spotlight hanging above the table on my subject or background.
I attached my Canon 20D equipped with an 85mm f-1.8 lens and three Opteka lens extension tubes to one of my tripods. You can see that my electronic flash was off to the side and aimed toward the center of the background only and not at all at my subject.
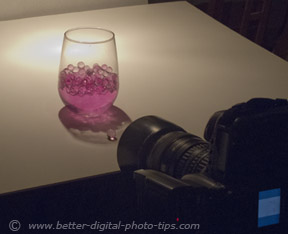 Water Beads In a Glass
This photo of the set-up on the left was taken without using flash and it shows how the spotlight is brightly illuminating the background, just behind the glass filled with small, pink spheres.
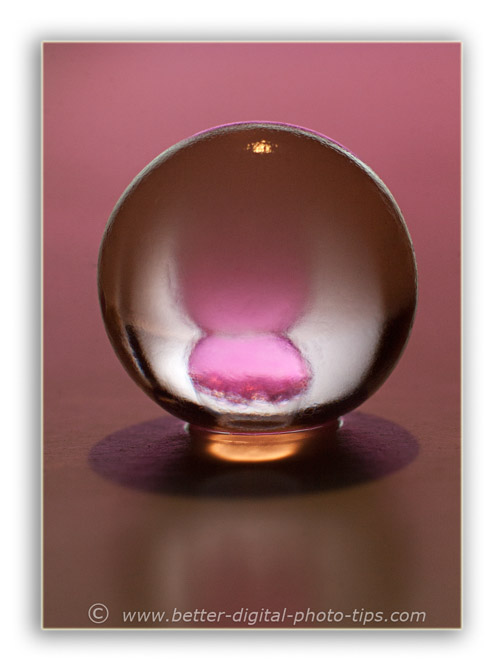
The resulting photo below is pretty interesting.
The subject matter is actually a gelatinous material that is sold as crystals at our local store and is used to start roots from plant cuttings. When placed in water, the crystals swell dramatically and become pastel-colored spheres.
In the photo below, if you look carefully you can see the yellowish highlight on the top of the sphere. That is from the overhead spotlight that was left on during the exposure. I did not adjust the color settings on my camera at all.
The thin white highlights on both sides up high on my sphere are spectral reflections of the reflection from the strobe firing its light against the white background.
In portrait photography, a similar light that skims off the edges of your subject's face is a rim light. This is a good way to get separation from the background.
macro photography lighting tips - surprise
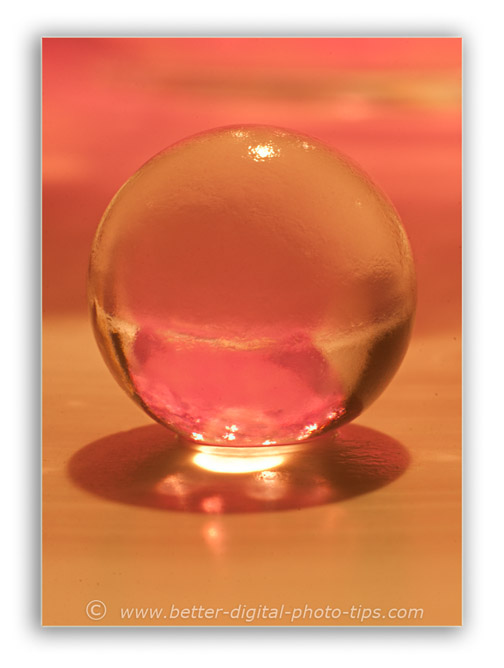
I was startled by the color of the resulting photograph. Compare the purplish photos above with the orange tinted photo below.
Here is where the big surprise came. Same subject matter below, but I forgot to turn the strobe back on in the photo below. The only change I made was to increase my exposure. I had to change the shutter speed to get a longer exposure with only the overhead spotlight providing any light.
What a dramatic example of color temperature differences in light sources.
Okay. I know I am a lighting geek, but for me that is a big part of the fun of digital photography. When I was in photography school I did not get any macro photography lighting tips, but we did cover two different ways to light glassware.
These translucent spheres have the same optical qualities as glassware. I found another web site that focuses on tabletop photography of glassware. It has a lot of tips on lighting glassware, using light boxes, dark and light backgrounds, and a few tricks that can be applied to your macro photography lighting set-ups. Here is the link to the site: tabletop photography-glassware.
With digital photography, the cost of experimenting and shooting many variations is only the time you invest. You don't have any film, processing, or printing to do. That's what so cool about digital photography and it's something we often take for granted.
Having the LCD screen makes it even easier to review and adjust as you go. I hope that you got something out of this post. See the related helpful macro photography posts listed below my signature.
Keep shooting and stay inspired!


ABOUT BRUCE LOVELACE
Bruce is the publisher of this website. He is the author of the book "Improve Your Photography Instantly." Read more on Bruce on his Bio Page. He's been known as The Traveling Photographer ever since 1994. Read more about this website.
View some of Bruce's photos on Instagram. Visit the Facebook Page. Watch him on YouTube. Bruce runs photo workshops for kids and adults, and provides one-on-one photography coaching.
Digital Photography Education Location on Google My Business
Super Simple Macro Lighting Photography Without Flash
Back from Macro Photography Lighting Tips to Macro Photography
Go to Macro Photography Ideas
