HOW TO POSTS: LIGHTING AND COMPOSITION
The 7 steps on how to take a self portrait
with a DSLR (or mirrorless) camera
WRITTEN BY: BRUCE LOVELACE
UPDATED: March 29, 2024
 Mirror Selfie
Wanting to learn how to take a self portrait may seem a little strange at first. After all, usually you are normally the photographer, not the subject. You're accustomed to being the creator of the photograph, the artist and not the model.
But now, when taking a picture of yourself, you still need to think like a photographer and take the right steps, perhaps even more so.
Here are the 7 steps on how to take portraits of yourself, the photo equipment to use, as well as some ideas on the creative side of creating a great self portrait. They're in order, but the first 3 steps are interdependent on each other depending on the environment your self portrait is being take in.
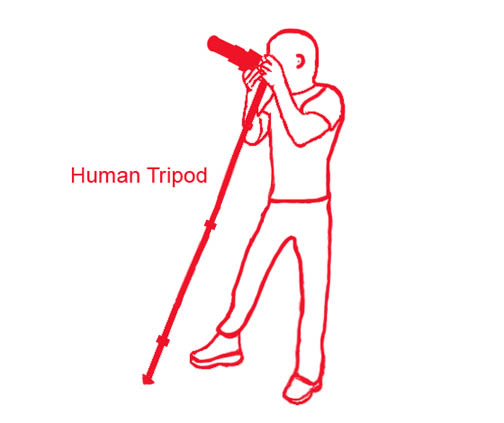
1. Find a stable spot for your camera.
Your camera must be stabilized firmly for 2 reasons. You want to protect it from damage and you want to get a nice sharp self portrait. There are many ways to accomplish this. A sturdy tripod is the number one accessory that works in a big variety of situations.
Depending on your location any sturdy object at any height can be used to support your DSLR or mirrorless camera. You can adjust the upward angle of your camera by sliding a thin object underneath your lens barrel.
2. look at the lighting and adjust if necessary
 Fill Flash
Lighting is likely the most difficult photography skill to master, but that doesn't mean you have to be intimidated by it. You can find simple ways of using fill flash, a reflector, or even shooting a different time of day to improve on your self portrait lighting.
The secret is to experiment with lighting every time you can, including when you're trying to take a great self portrait. Scanning over a few of the principles of lighting will help, but generally speaking, you want to have the main light source behind or to the side of the camera.
3. compose your photo
There are a few guidelines you can try to improve your composition. Like other aspects of photography, your composition techniques will improve with practice.
Occasionally, the rule of thirds can be helpful. At other times, you can employ a few additional compositional techniques.
4. get the focus right
At first one of the biggest mistakes that is made with taking a self portrait is missing the focus and getting a blurry you as the main subject. The challenge is how to focus your camera when taking a self portrait. There are 2 simple techniques to make sure your camera lens will be focused at the right distance.
- First focus on an object that will be the same exact distance as you will be from the camera. Carefully switch to manual focus, then recompose your original composition if needed.
- You can temporarily grab your camera and take it with you to the position you will occupy in your self portrait. Focus your camera back on the spot where it will be for the photo. Set your camera on manual focus and return it to its original spot. The return to your posed position and proceed to step 5.
You'll find the video below very helpful on nailing sharp focus when taking your self portrait.
5. time your photo right
 Remote
Trigger
There are 3 ways you can take your self portrait with you positioned in the right place.
- Use the camera's self timer. You'll have plenty of time to walk from your cmaera to your photos spot in time for the exposure to be made.
- Get yourself a remote shutter trigger. They're very affordable and there's definitely several that will work with your particular camera model. They can be set to have use delayed shutter release.
- Use an app for your camera, downloaded to your cell phone, to trigger the camera from your position in the composition.
6. evaluate your first attempt
 Bad Lighting
Look at your first attempt. Assess your photograph. Notice what you like and also what you'd like to improve about your self portrait. You may want to make one single change or perhaps a couple of things could be improved on.
If you anile it on your first try you can skip over step 7 and go to step 8.
7. take a better self portrait
See if you can improve your self portrait by taking a different perspective or angle, using a different lens setting, changing shutter speed, or adding fill flash or a reflector. Take a few variations based on the changes that might work.
8. Edit your self portrait
 Editing Software
Once you've got your self portrait the way you want, consider taking one last step to take it to an even higher level. Whether it's just tweaking the color balance, exposure, or sharpness, you can make dramatic improvements in your self portrait with software.
The possibilities on ways to edit your portrait are literally endless as is your choice of the right software. Much of the editing software is free too!
photography equipment needed
 Mini Tripod
Using a tripod makes it easier for you to compose your photo ahead of time and insure that the camera will be aimed in the right direction.
I usually have this mini tripod made by Sunpak with me. It's so light, it's compact and is perfect for a point and shoot digital camera for using on a table top or if I am shoot something down low.
It has all of the features of a full size tripod. It can tilt, swing or rotate, but it won't be stable enough for a full sized digital SLR.
The emergence of the selfie monopod as an extremely popular cell phone accessory, quite affordable and selling like crazy on Amazon, has changed the way people are taking their own portraits. There are a few super heavy duty models' that can handle the weight of your DSLR camera used for a self portrait.
As an Amazon affiliate I may receive a small commission from qualifying purchases, at NO added cost to you.
additional ideas on self portraits
 Clamp for
Small Cameras
Another very versatile piece of photography equipment is a camera clamp if you have a compact or small mirrorless camera.
It can clamp on anything that is sturdy and it's arm can be bent in any direction. When I have been caught without a tripod, I've used a bean bag, a towel or a pillow.
As long as your camera can be supported and aimed without the chance of falling, you can use your ingenuity if you don't have a tripod.
If you have a camera with a rotating LCD screen like my Canon Powershot A620, you can hold it at arms length and still see the screen to compose your self portrait. I call this the Facebook self portrait method.
 Poor Self
Portrait Technique
If you are not able to see the LCD and you are holding the camera as you shoot, set it to wide angle and at least you know you'll be in the photo.
 Creative self portrait
This self portrait was easy to compose because I wanted to make a picture of self as a photographer.
I stood in front of the mirror, aimed, then zoomed in to get a tight crop. It was a bright day and there was enough existing light with my Canon 5D set at ISO 1600 to shoot in our bathroom without flash.
I did a little creative editing with Adobe Photoshop and created the eye within the camera lens, and then added saturation and contrast to give it an "edgy" look. Once you know how to take a self portrait that is straight forward, you may want to consider getting a little creative. If you want some ideas, I suggest you go to Flickr.
When I last looked, there were over 300,000 pictures in the "self portrait" category and over 17,000 members in the group 365 Days. This groups is a group of photographers who have given themselves the assignment of taking a self portrait, everyday for an entire year.

Not only is that challenging, but it will surely get your creative juices flowing.
There are some average photos and some not so great photos: but there is so much variety and creativity, it's bound to inspire you to think outside the box.
Taking a picture of self can be a step outside your comfort zone. In this shadow self portrait, I used the Rule of Thirds and the principle of balance to compose this photo. When I got my first film camera, I didn't how to take a self portrait. The camera had no self timer or cable to trigger the camera's shutter.
Now, timers are standard on all digital camera's and the fact that you can experiment and delete your Photo Mistakes. It's a lot easier to get creative when you take a self portrait, because you can see your results right away with your digital camera.
The other benefit of learning how to take a self portrait is that you are learning how to take better pictures in general. Simply because of the wide variety of techniques you are using to create yours self portrait, you are getting to be a better photographer.
I hope this post was helpful. See related articles below my signature or use the search page to search for any photography topic on this website.


ABOUT BRUCE LOVELACE
Bruce is the publisher of this website. He is the author of the book "Improve Your Photography Instantly." Read more on Bruce on his Bio Page. He's been known as The Traveling Photographer ever since 1994. Read more about this website.
View some of Bruce's photos on Instagram. Visit the Facebook Page. Watch him on YouTube. Bruce runs photo workshops for kids and adults, and provides one-on-one photography coaching.
Digital Photography Education Location on Google My Business
related self portrait topics
Best Monopods for Self Portraits
Photography Lighting Equipment
What to look for when choosing the best stick for taking selfies
Biggest complaints from consumers who bought self portrait monopod
A whimsical look at the meaning of the selfie portrait.

%20CAMERA)
Recent Articles
-
10 Simple Creative Photography Techniques to Play With Using A Camera
Apr 10, 25 04:36 PM
 Be creative with your photography. Use this remarkable list of 10 creative photography techniques. Great photo projects for beginners.
 -
What Is a Selfie. Definition and Guide to Improving Your Selfie Photos
Apr 02, 25 02:25 PM
 Selfies have exploded on social networks and permeated throughout our society, the self portrait. But exactly what is a selfie and How do you take a good one?
 -
Monopod Stability Tip. How to Hold Your Monopod Steady. Simple Tricks
Apr 02, 25 12:32 PM
 Make your monopod work like a tripod. Yes, Really? Monopods are worthless unless used right. Use this smart monopod stability tip.
Improve your photography instantly. Get the 2 most important chapters of my photography book for free.