HOW TO POSTS: LIGHTING AND COMPOSITION
3 simple ways to successfully turn your color photos into emotional black and white photography
Have you ever looked at emotional black and white photography? Sometimes, the color version of that photo doesn't have the same impact. Why not?
There are several reasons why black and white can evoke a more intense reaction from us as human beings. Why it can is a topic we'll explore in depth in another post. Realize this first, not all photos look better in color or in black and white.
Reading this post will give you a better understanding on determining when and how to get emotional black and white photos. Just take a second and move your mouse over the photo below to see it in black and white.

In this family portrait with dogs in the snow, the color version is clearly a nicer image. In the black and white version, the couples face almost fade away because of the flat lighting and the busyness of the background. The most important part of the portrait is the human faces and they show up so much better in the color photo.
Okay, let's turn to the 3 ways you can create black and white photos with impact. It's not just converting it to black and white with software. There's more to it than that. The best way to get powerful black and white photos is to follow this simple 3-step formula.
- Choose the right subject.
- Use the right lighting.
- Edit it creatively with software.
This post will give you inspiration to try some black and white photography and get a more emotional image.
I don't know the psychological reason for it, but when the color characteristics are removed from a picture, it sometimes automatically has more of an impact. Maybe without the colors, we focus more on the subject matter.
1. what subjects are better for black and white photography
Certain subjects lend themselves well to be photographed in black and white, but which subjects? Subjects with strong compositional elements are usually good to use for subjects in black and white photography.
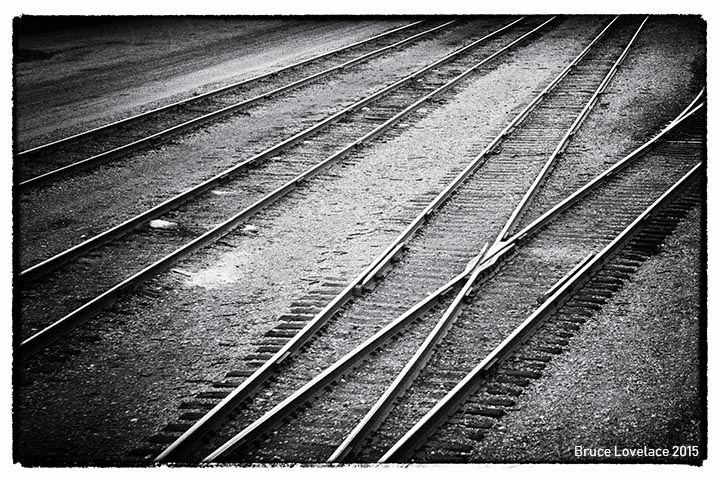
I know as soon as I got the idea to photograph the train tracks I knew I was going to process it as a black and white photograph. The strong diagonals contrasted with the repetition of the railroad ties and elimination color from the image makes the composition stronger.
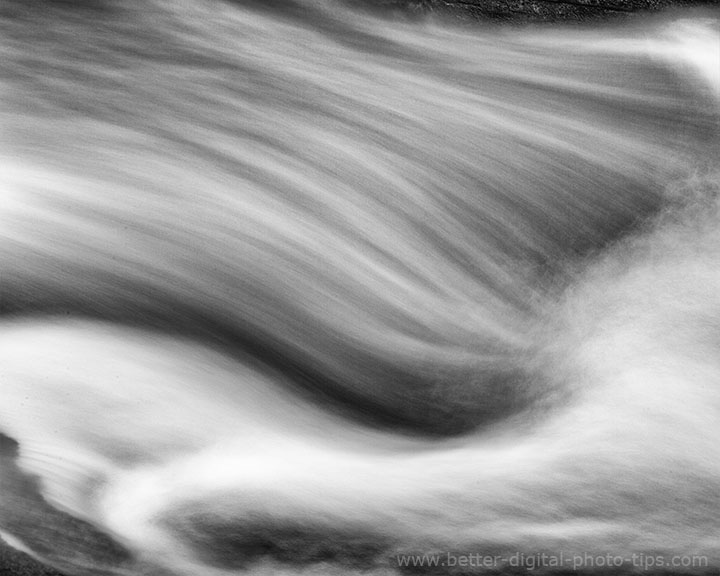
Look to some of the basic building block materials of the earth and you'll find good subjects for black and white photos. Think about sand, rocks, metal surfaces, water, and air as starting points. Because black and white is "old fashioned" you can photograph subjects like old structures and rustic items.
Below is a good example of how a black and white photo has a little bit more pop to it that its color counterpart. The metal diamond plate is another good type of subject for a black and white image.
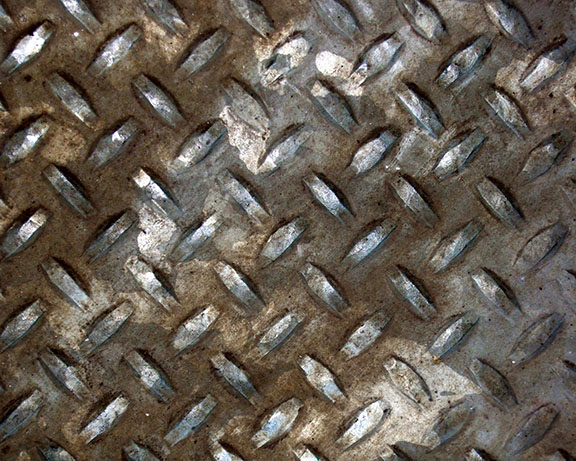 Metal texture in color
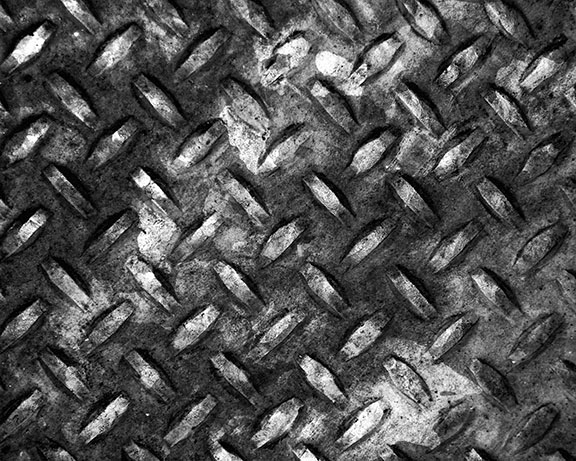 Metal texture in black and white
Photographs of people are also a good subject for black and white, provided the lighting is done right. The lighting becomes even more important with black and white. I used the natural light from this bay window for this color portrait of this young girl for her first holy communion.
I placed a large white card on the right to add a little fill light. The green color of grass is not overly distracting, but look what happens when we eliminate the colors and turn the photograph into a black and white.
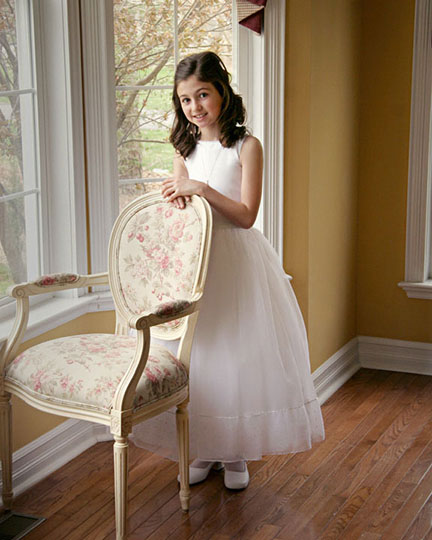 Good Subject. Good Lighting.
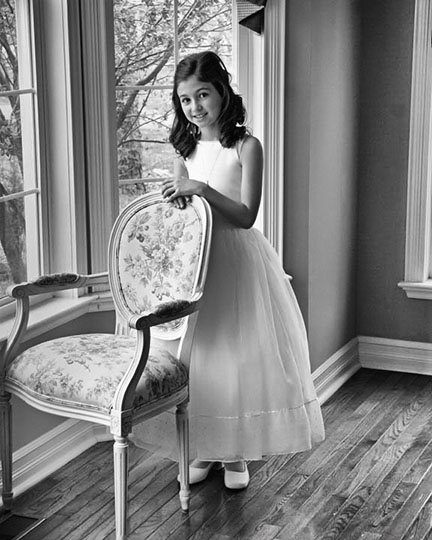 Converted to Black and White
Notice with the edited holy communion image, how the texture in the chair and woodgrain in the flooring are accentuated.
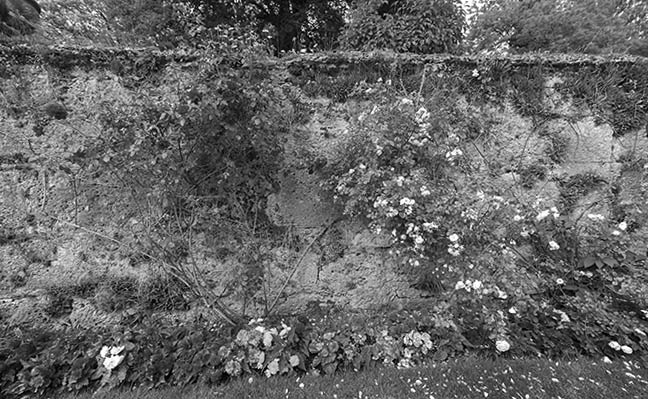
The photo of the flowers and the wall below was taken during a trip to Austria, where the sound of music was filmed. It's is a dreadful candidate for a black and white image. With the color of the red flowers and the green vegetation gone, this is a busy and drab photo, and at the same time has no center of interest.
what's the best LIGHTING for black and white photography
LIGHT QUALITY: The quality of light isn't about how "good" or "bad" the light is but rather refers to how the light looks, how it portrays your subject and the rest of your photo. "Hard" light gives you harsher, more distinct shadows. "Soft" light produces softer, less distinct shadows. "Flat" lighting gives you shadowless lighting.
Shadows create texture. Without color to visually separate parts of your photo from each other, pay attention to how shadows are working in your composition. Move your mouse over the photo below to see it in color.
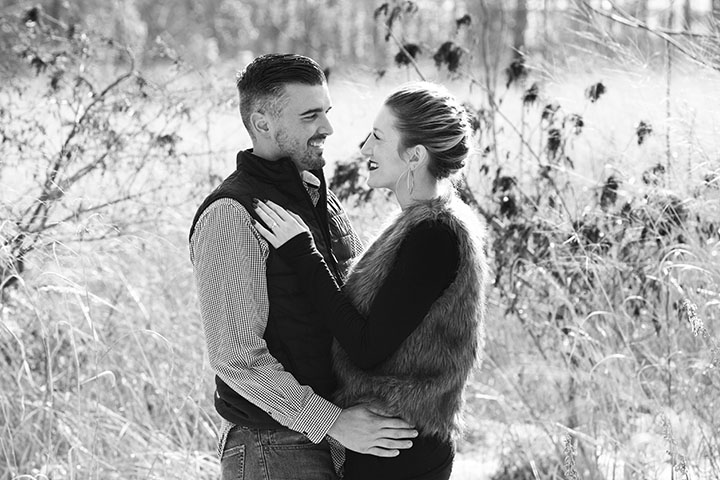
This is a good example of a photo that works both in black and white and color. In the color photo, the colors of the subject and the background go well together. In the black and white photo, the strong backlighting created good visual separation between the subjects and the background.
LIGHT INTENSITY: Brighter areas of your photo tend to come forward visually and darker parts of the photo recede. When color is eliminated, objects in the photo are separated by their lightness.
DIRECTION: This is a biggy. The direction that the light is coming from has a huge effect on how your subject appears. Light that comes in from the side creates more shadows, form and depth. You can make a subject look completely different by changing the direction of the lighting.
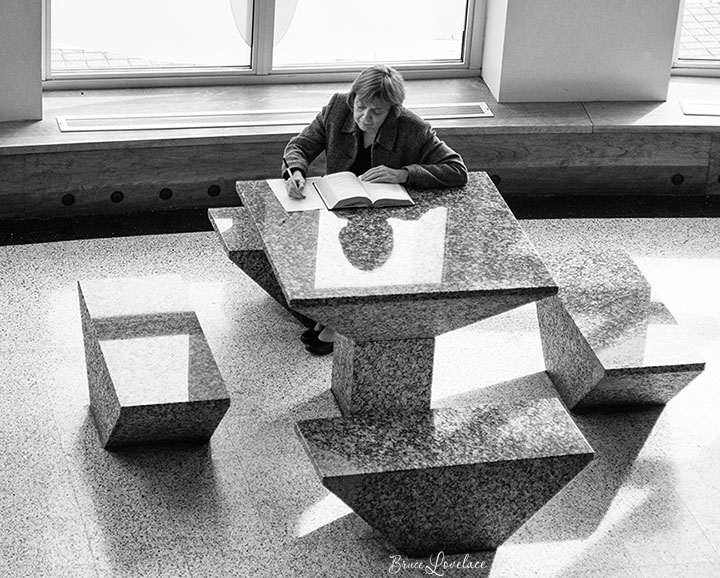 The lighting in this area of the university library was perfect for me to take a black and white approach to create an emotion in this portrayal of one of the college professors. I liked the contrast of all of the geometric shapes, the benches, the table, and the windows contrasting with the organic shape of the human figure.
The lighting in this area of the university library was perfect for me to take a black and white approach to create an emotion in this portrayal of one of the college professors. I liked the contrast of all of the geometric shapes, the benches, the table, and the windows contrasting with the organic shape of the human figure.
3. software to turn color into black and white
Let's face it. Some black and white photos don't look so good. Sometimes it's a bad subject matter for black and white. Sometimes it's the lighting, and sometimes it's the wrong software. Let's take a look now at the choices for software to process your photos in black and white.
Don't use the black and white mode in your camera. You sacrifice using that photo in both color and black and white. Wait until later and you can experiment with a copy of your original photo with software.
You can use the software that came with your camera to easily convert any of our color photos to black and white. You can also use free software, called Gimp, white has severals ways to convert your color images to black and white. See the short tutorial below.
At first it may seem intimidated-I know I was when I first used Photoshop-but you can screw up copies of your images, rather than your original photos, and there is no financial cost or cost of ruining a valuable photo.
Speaking of Photoshop, it's the granddaddy of photo editing software and I can't honestly recommend it to you. You just don't need most of what it has and it takes forever to learn how to use it. Don't get me wrong. I use it all the time, but I've been editing digital photos for almost 20 years.
Recommended software for black and white conversion
There are so many options for turning your color photos into emotional black and white photos that an entire website could be made on just that task. I know you'd rather keep it simple so I've narrowed down to these two recommendations. These are good choices is you don't have or don't want to use the software that came with your camera.
In Adobe Photoshop, there are several ways to accomplish this. The quick and easy way is to simple make an adjustment to the saturation.
Saturation reduction eliminates color. This is okay sometimes, but I prefer to use a "Photoshop Action" The action I use came with a program call Quick Mats, developed by John Hartman. It uses the different color channels to get a more realistic black and white image.
Using separate color channels give you a whole lot more control and more tonal variations. There are also really good plugins to Photoshop that do an even better job of converting to black and white such as Nik Software Silver Efex Pro.
shoot raw and convert to black and white post-capture
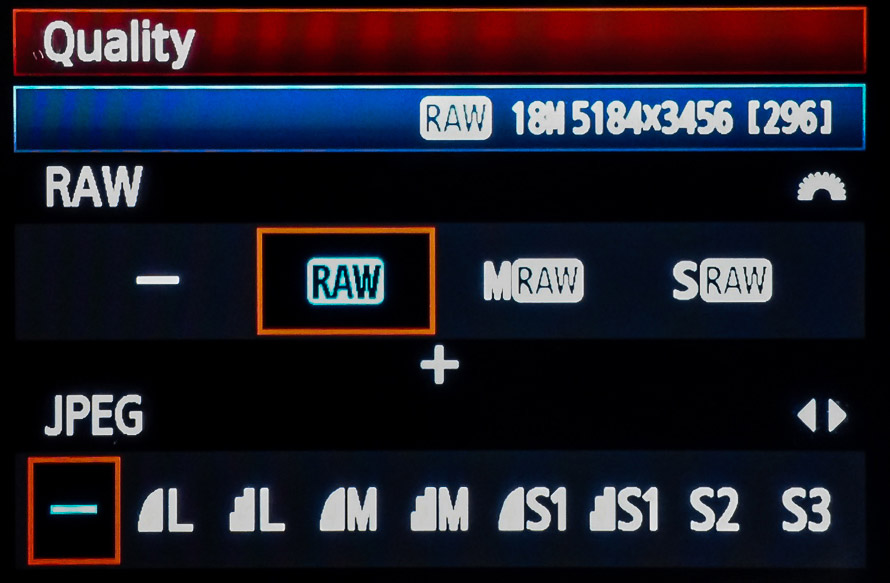 RAW Camera Mode
Shooting in "raw" mode gives you the opportunity to process your color image literally into many different versions. They can be different black and white versions or color photos, all from the same original photograph.
With large capacity memory cards being so affordable, you never have to worry about running out of camera memory from shooting large "raw" files. You can uses "save as" when you save the files, using slightly different file names.
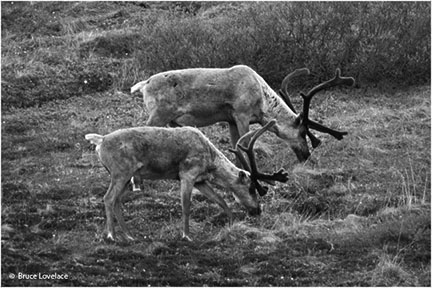
Within the realm of converting color photos to black and white, you also have an infinite number of ways to process a RAW file. Look at these 3 different black and white images of these 2 caribou I photographed in Denali, Alaska.
 1
1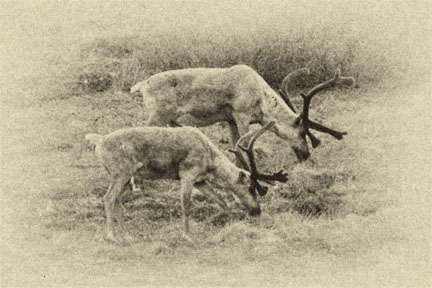 2
2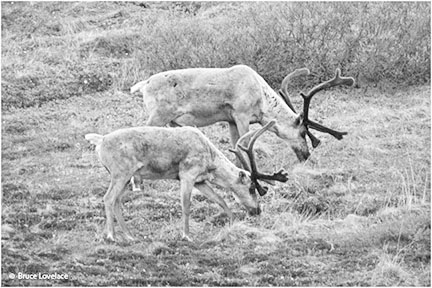 3
3In the original color image, the background was non-distinct and didn't add much to the impact of the photo. The first conversion on the left aids in separating the caribou from the background. The vignette conversion in the middle gives you an antique look and in the third photo on the right, the caribou blend in with their environment.
when to use black and white
In a sense, black and white photography strips away all the extras, and forces you to think about things like contrast and emotion, in a way that isn’t always be as crucial when you’re shooting in color.
The biggest question that comes to mind in this whole discussion is how do you know when to use black and white instead of color. It certainly is subjective and everyone has an opinion, but here is some guidance for you.
You should convert your photo to black and white when the form, texture, or your composition is more compelling than the colors included within your camera frame. It's a good idea to eliminate the color in your photograph when some or all of color is distracting from what you're trying to emphasize in your photo.
Black and white photography removes the colors and makes you think about contrast, emotion, and compositional elements of photography at a much higher level than you do with color photography.
final REMARKS on converting color to black and white
Learning how to visualize what a scene will look like in black and white is like any other new skill. It takes a little practice. The best part about digital photography is that you can experiment and have fun playing around with the results you get.
Although certain subjects look great in color, any rules about what to shoot in black and white should be broken. Photograph anything you want with the idea of how it would look as a black and white image in the back of your mind.
You'll be surprised on how much fun it is to imagine your composition as a black and white ahead of time.
Keep shooting. Keep learning. Keep improving.


ABOUT BRUCE LOVELACE
Bruce is the publisher of this website. He is the author of the book "Improve Your Photography Instantly." Read more on Bruce on his Bio Page. He's been known as The Traveling Photographer ever since 1994. Read more about this website.
View some of Bruce's photos on Instagram. Visit the Facebook Page. Watch him on YouTube. Bruce runs photo workshops for kids and adults, and provides one-on-one photography coaching.
Digital Photography Education Location on Google My Business
