HOW TO POSTS: LIGHTING AND COMPOSITION
deep depth of field photo gallery
examples of maximum depth of field
This post will give you sample photos showing deep depth of field, explain why you want to achieve a large depth of field and also give you tips on how to get everything sharply in focus.
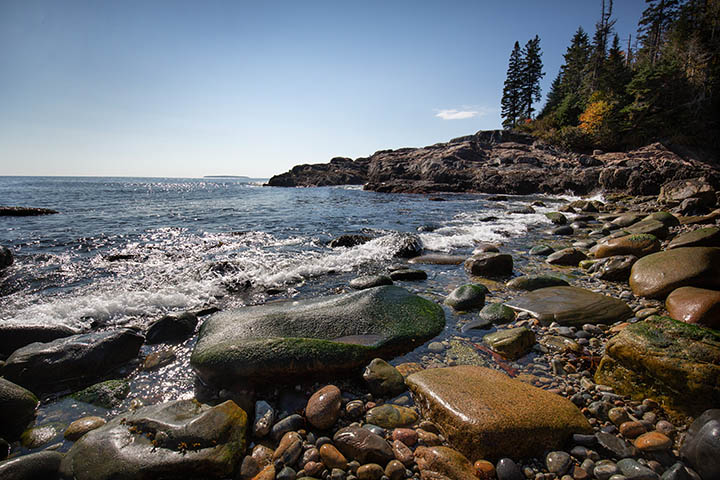 Acadia Landscape. I used a wide angle lens (16mm) and a small aperture of f/13 to get a large depth of field. That made both the close up rocks and the distant shoreline sharply in focus.
Definition of Deep Depth of Field
Deep depth of field can be defined as a large range of clearly focused objects within your camera frame. A photo that has both close by and distant objects in sharp focus is also referred to as having a "large" depth of field or "extended" depth of field (DOF).
Deep depth of field is desirable particularly often with landscape photography where object close and far to the camera are included into the composition.
why use a deep depth of field?
You're probably wondering why deep depth of field is so important. Getting a deep DOF will make your photo sharp and clear for objects that are near AND far from your camera.
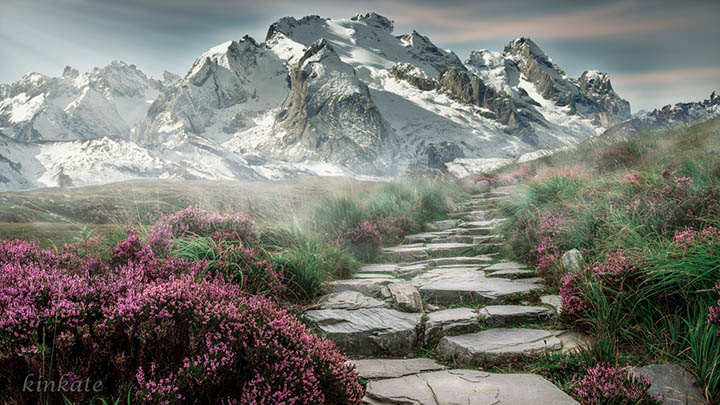
Depth of field is good to maximize when you want to create visual depth in your photo. Including sharply focused objects in your photo, both near and far makes an image have more of a 3 dimensional feel to it. It gives your eye an opportunity to travel from one area of the frame to another. In this landscape photo of the mountain and the stone steps, your eyes have a path to follow into the photograph.
Having the flowers, all of the stone path, and the distant mountains all in focus gives your several points of interest to enjoy, no matter where in the photograph you look.
how to get a deep depth of field with your camera
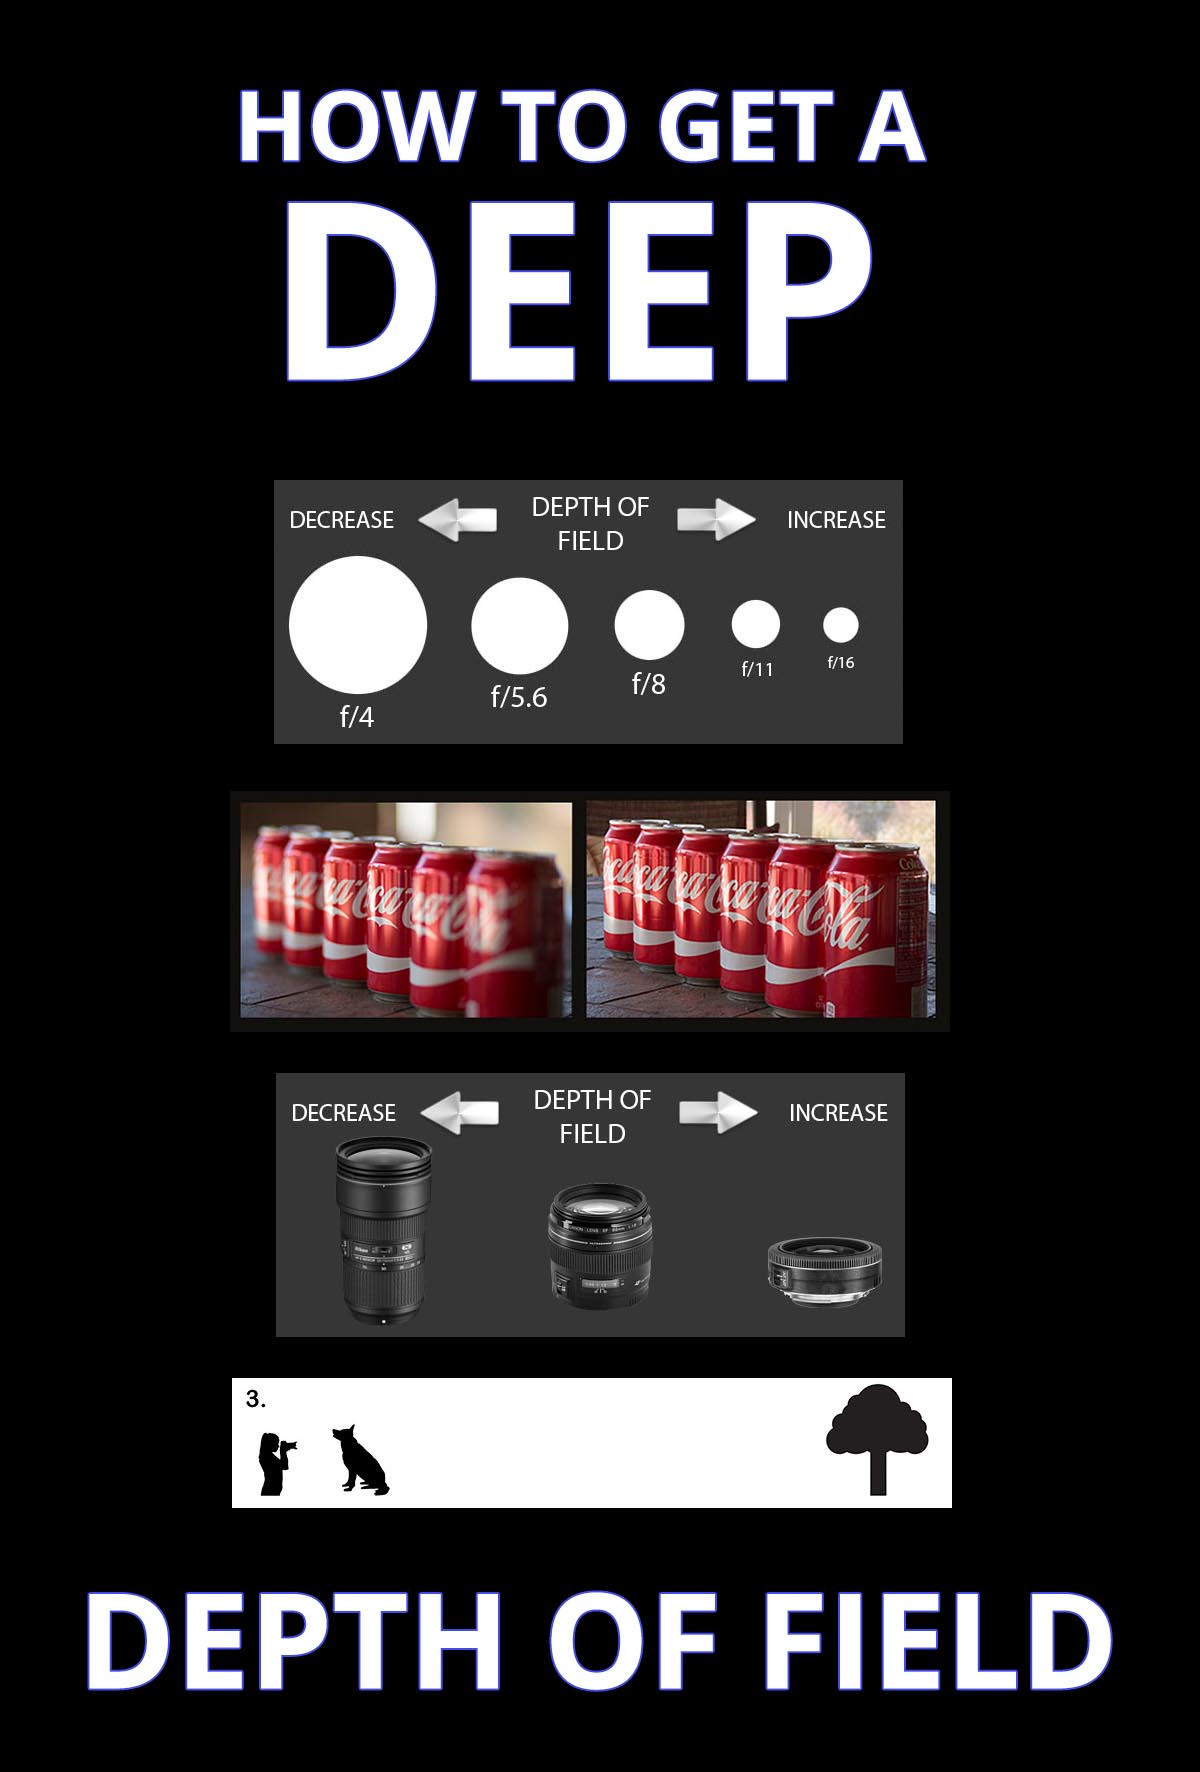
There are 4 ways to make a large depth of field. Most photographers know 3 of the ways to extend the depth of field, but don't know the 4th way because it's not so obvious.
The more of these techniques you can use together then the more depth of field you will achieve. Here are the 4 techniques to get better a bigger depth of field and a broader range of things in focus.
1. Use the smallest aperture you can
This is the most well known tip for getting everything in your photo in sharp focus. Look at the comparison of depth of field in the three photos of the bottle caps below. Understanding the way f/stop numbers work can be confusing at first because using a big f/stop number, like f/22, actually gives you a small aperture.
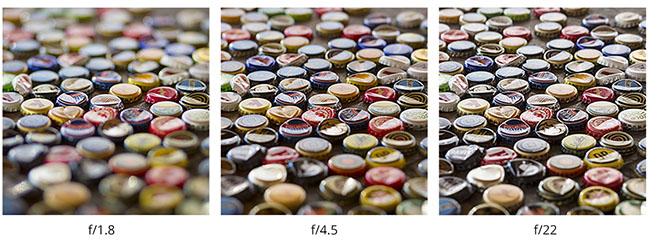 Depth of field comparison by f/stop
The 3 photos of the bottle caps were taken with a medium telephoto lens, a Canon 85mm f/1.8, which gives you less depth of field than a wide-angle lens will. That's tip #3 and we'll get to that in a second. What you need to remember with this method is to "stop down" your lens to the biggest f/stop number to get the best depth of field.
You can see, even stopped down all the way to f-22, the farthest and closest caps are not perfectly infocus. With a wide-open aperture of f/1.8, you can see you have very shallow depth of field. It's tougher when objects are close to the camera and that leads into the second tip.
2. AVOID including super close "macro" subjects
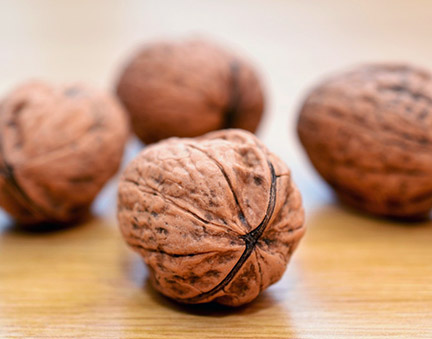 Avoid super close-up subjects
You won't get a large depth of field.
It's difficult to get a large depth of field when you're photographing close-up subjects. Because of the laws of optics, depth of field gets very narrow when you photograph up close subjects. Landscape photography often involves composing your photo with objects both close and far from your camera, so a large DOF is usually desirable.
In this photo of these walnuts, the lens was focused on the closest walnut. The resulting depth of field is quite shallow. Setting your camera lens to its absolute smallest aperture (the largest f/stop number) would have increased the depth of field to some extent.
It's actually a nice photography with the closest walnut in sharp focus and the farther away walnuts a bit on the blurry side.
3. Shoot with a wide angle Lens
This tip for getting good depth is a little easier to understand. Due to the optical properties of camera lenses, The wider the angle of lens you use the more depth of field you'll get. If you have a zoom lens, zoom out to the smallest focal length. For instance if you have an 18-55mm lens, zoom out to 18mm.
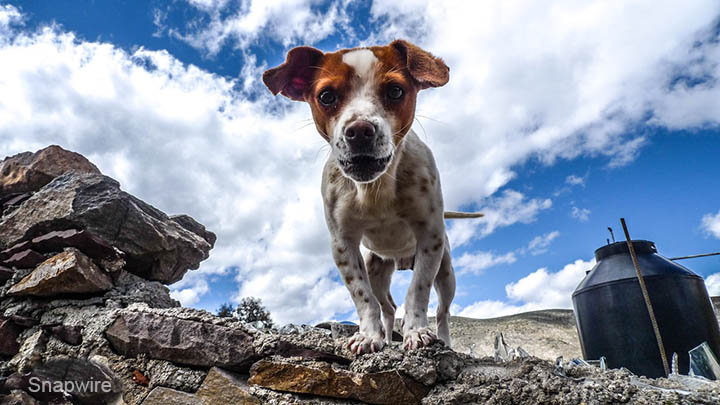 Wide angle lenses give you deep depth of field
A very wide angle lens was used to take this dog's photo. You can see that even the dog's nose and the clouds in the far distance are both in focus.
Wide angle lenses can also give you a very strong perspective and create very interesting photographs.
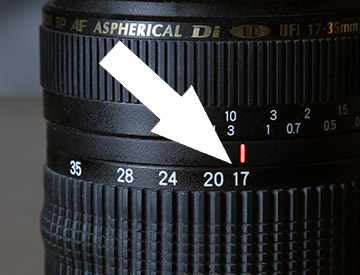
On a full frame camera (35mm sensor size) 17mm is considered ultra wide and gives great depth of field.
You can see what kind of reviews wide-angle lenses get on Amazon.
As an Amazon affiliate I may receive a small commission from qualifying purchases, at NO added cost to you.
On Amazon
4. Use a Camera With a Small sensor
I want to share with you an interesting fact about getting deep depth of field. Most people don't know this The smaller the sensor, the more depth of field you'll get. If you use a camera with a small sensor, the range of things in focus will be much larger. What does this mean to you?
Cell phone cameras naturally get much more depth of field than a compact camera, which gives you deeper DOG than a full-sized pro DSLR does. Huh? Yep, it's one of those optical principles again, but here's the advantage you have by shooting with a DSLR camera instead of using your smartphone. You get to control how much depth of field you want.
With a cell phone camera, because the sensor is so tiny, you will always have a lot of depth of field. As you'll see in the next section, there are times when you won't want to have a lot of depth of field.
example when deepest depth of field isn't Wanted
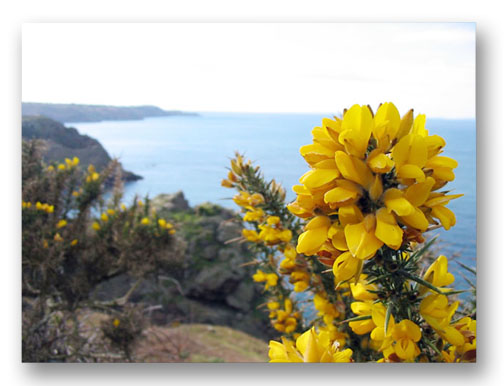 Intentional blur in background
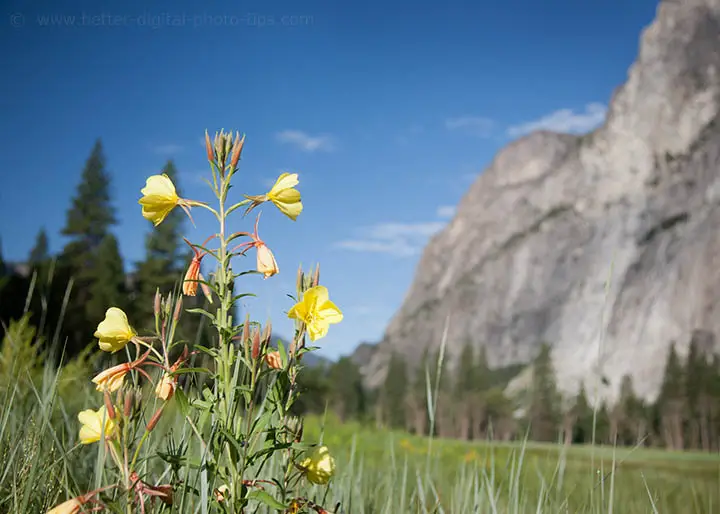
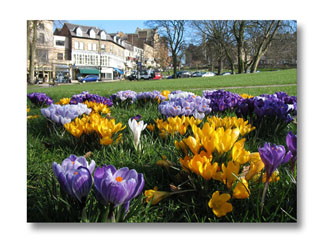
There are times when you may not want the distant objects in your landscape photography to be in perfect focus. The main subject in this landscape is the close-up of the yellow flowers. Setting the f/stop so that the background has a somewhat softer, out-of-focus look puts more emphasis on the nearby flowers.
The slightly more distant yellow flowers create a nice balance and then the blue water provide a great color contrast with the yellow.
 Example when deep depth of field
is not a desired outcome
Generally, you don't want to have deep depth of field when you are shooting a portrait. It's more desirable for the background behind you subject to be somewhat out of focus.
A blurry background is less distracting and your subject separates from the background when it is softer.
Portrait photographers like me use aperture priority when photographing people and set their lenses "wide open" to avoid too much depth of field.
Example when deep depth of field is wanted
Here is another example of a landscape photograph where it's better to have everything in sharp focus. You want the rocks in the foreground to be just as sharp as the trees and cascading water in the background.
There is no one center of interest to focus on, but rather this photo is more about several areas of interest combined into one single composition.
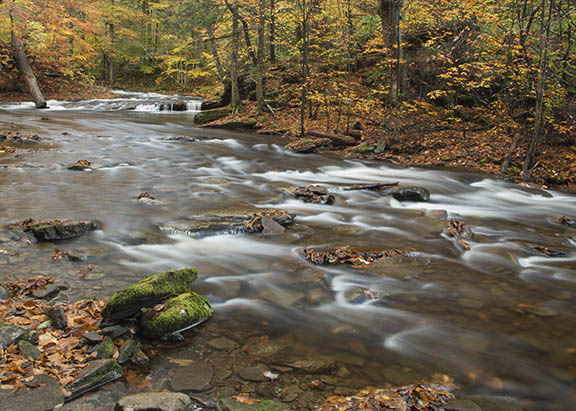 Aperture set at f/18 to give maximum depth of field and
 long exposure of 5 seconds to give "creamy" effect to water.
The moss-covered rocks in the nearby foreground, the winding stream and then the more distant cascading water create a pathway for our eye to travel. Having a clear and sharply focused pathway for our eyes to travel within an image makes it more interesting to view for a longer period of time.
additional tip on getting good depth of field And a sharp photo
Using a small lens opening (a high aperture number like f/11 or f/16) may require you to use a slow shutter speed to let enough light in for a good exposure. You will want a decent tripod to prevent even the slightest movement of your camera. You should you use your camera's self-timer or a shutter cord to prevent any camera giggle when you make your exposure.
Compare the two examples below. In the first photo I set my aperture at f-3.5. In the second example I set my aperture to f-22. In both photos I focused on the letter 'i" in Cusinart.
If this photo were being used for an advertisement for the coffee bean scoop, the top photo would be the better choice. It's a little more artistic. The deep depth of field in the bottom makes the sharply focused coffee beans a distraction from the product, which is the scoop.
Is this a small difference? Yes! But understanding the subtle differences in depth of field can turn an average photo into a good or great photo.
Here is a another still life type of photo where I used f-22 as an aperture to get everything in sharp focus. The angle that it was composed at limited the range in distance from the closest part to the farthest part of subject matter and made it easier to get everything sharp.
These deep depth of field examples can whet your appetite for a good cup of fresh ground coffee, don't you think? Hey, have some fun!
The best technique to use for controlling depth of field is to practice different situations and learn from the results you get. The size of your camera's sensor, the aperture you choose, the lens zoom setting and the distance that you focus on all affect how much depth of field you will achieve.
I hope that this article gave you a great starting point to understand what's involved with depth of field and gives you the confidence to do some experimenting with it.
Thanks so much for reading this post. If you've enjoyed any of my posts it would mean the world to me if you'd share with others, or reach out let me know through Pinterest or Facebook.
Stay inspired!


ABOUT BRUCE LOVELACE
Bruce is the publisher of this website. He is the author of the book "Improve Your Photography Instantly." Read more on Bruce on his Bio Page. He's been known as The Traveling Photographer ever since 1994. Read more about this website.
View some of Bruce's photos on Instagram. Visit the Facebook Page. Watch him on YouTube. Bruce runs photo workshops for kids and adults, and provides one-on-one photography coaching.
Digital Photography Education Location on Google My Business
