HOW TO POSTS: LIGHTING AND COMPOSITION
how to fix blurry digital photos
(And how to avoid taking Blurry Photos)
Do you want to know how to fix blurry digital photos? Let's face it. It's the biggest problem photographers have with digital photography. Don't you just hate it when an important photo you took comes out blurry? Join the club-I've have had my share.
This post gives you the 3 simple steps you can take to avoid blurry pictures to begin with.
You'll also learn how to fix blurry pictures online, or fix them on your own computer. That's not bad, right, but wouldn't it be great if you could avoid blurry pictures to start with? Good news. Let's look at the two main causes of blurry photos first, and then work on how to improve any blurry photos after that.
What is the main cause of Blurry Photos
The biggest cause of blurry photos is from motion. This includes blur from camera movement and blur from subject movement. The second biggest cause of blur with your photos comes from focusing errors. We'll look at both in detail.
 Do either of these types of blur look familiar?
1. motion blur
Motion blur may be blur caused by movement of the subject or by movement of the camera lens or, by what's even more complicated, a combination movement by both. There are a few situations where you may actually want to have a blurry background to create a sense of speed, or blur the background on purpose to bring attention to your subject.
how to avoid motion blur in your photos
Of course the best way to fix blurry photos is to prevent blurriness from happening in the first place. That's the goal to achieve. Here are the simplest and most effective ways to avoid blurry images caused by motion.
- HIGHER SHUTTER SPEEDS. If you adjust your camera's settings to give you a faster shutter speed, any blur from camera or subject movement will be minimized. The faster you make your shutter speed, the less time your subject or camera can possibly move and create blurriness.
- USE YOUR CAMERA'S FLASH. Freeze the motion. Your camera's flash only lasts for about 1/500 of a second or less. That's plenty fast enough to "freeze" most of the subjects you are photographing, provided the shutter speed isn't too slow.
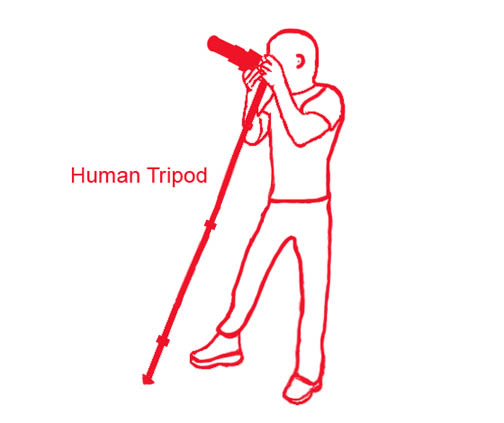
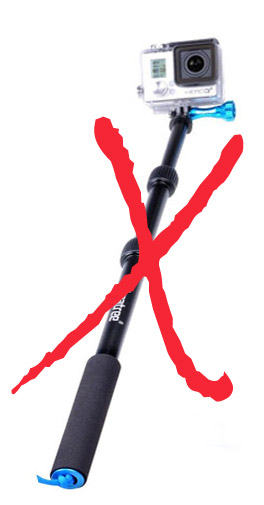
- TRY A TRIPOD. Both tripods and monopods will help you steady your camera. Using a tripod correctly to get the best stability is by far the most effective way to get sharper photographs. Image stabilization is likely built into your camera but there's nothing better than having a physical support to hold you camera in place to improve your photos sharpness. Using a tripod or a monopod will not prevent blurry photos that come from your subject movement. Then you need to fix your blurry photo by using either method 1 or 2 above to stop the motion of your subject.
how to steady your Camera technique
Even the slightest movement of your hands can cause a slight blur in your photo. Any accessory, like a tripod or monopod is great to have along to steady your camera, but the following technique is very effective too.
You can help to avoid getting blurry pictures from camera movement during the photo exposure by improving your shooting technique. Here's what you can do: The half exhale technique:
- Hold the camera firmly in the right position.
- Take a deep relaxing breath in.
- Exhale half of your air. Stop.
- Squeeze the shutter button gently.
- Hesitate after the click, before you move your hands.
Additionally, the way you hold your camera will affect motion blur too.
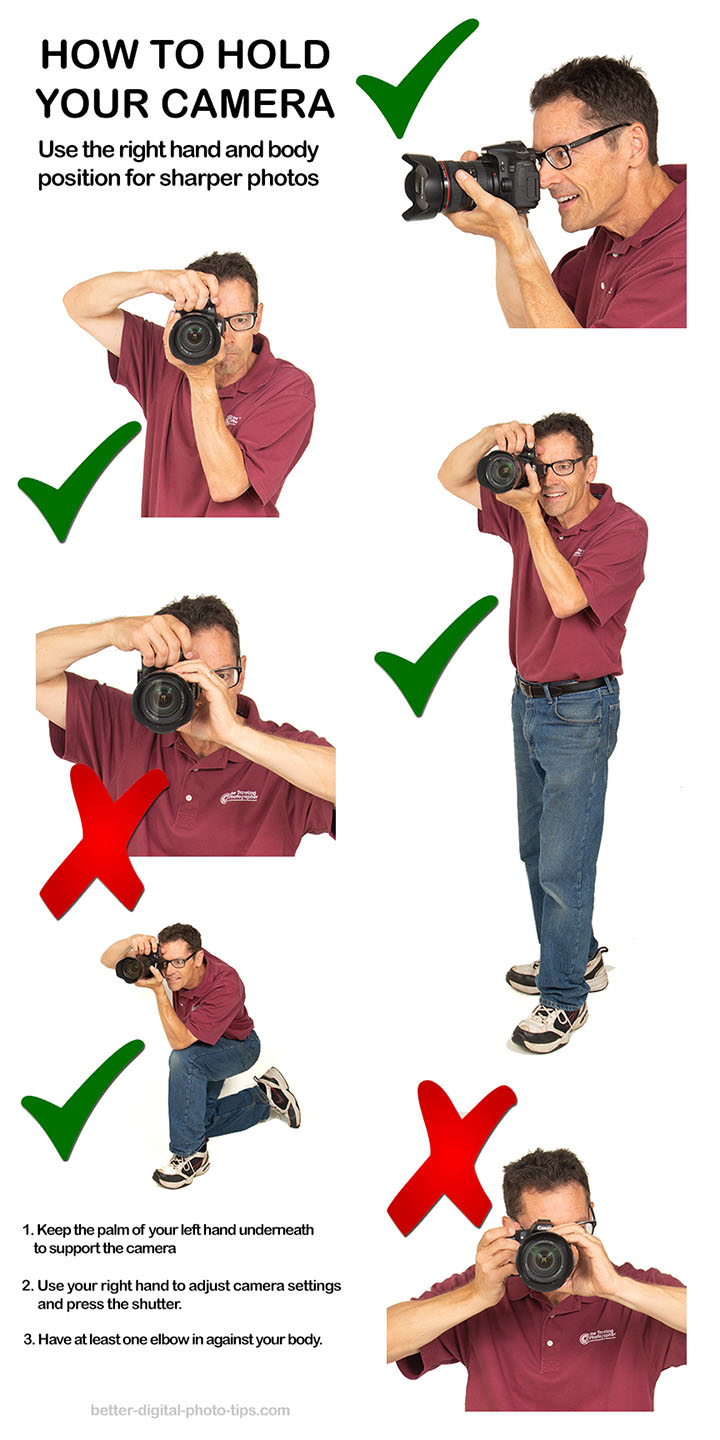
How To Hold Your Camera Properly To Avoid motion blur
Look at the techniques to properly hold and support your camera in the infographic below.
STEPS TO TAKE FOR A STEADY CAMERA
- Keep the palm of your left hand underneath to support the camera body and lens, and to operate the zoom on the lens.
- Use your right hand to adjust any camera settings and to gently press the shutter.
- Have your left elbow in against your body.
2. focus blur
Although it's another big source of frustration for photographers, focus blur is usually the easiest issue to avoid. Your camera's auto-focus works well most of the time, but sometimes it falls short.
There are two situations when auto-focus falls short and gives you a blurry subject.
- Dark lighting situations, dark subjects, and subjects that are smooth with little contrast.
- Focusing on the wrong area of your photo.
For a complete guide to troubleshooting common issues you're experiencing with your camera's focusing system, read this post on camera focusing failures. Now, check out this example below of blur that was caused by me choosing the wrong focus point.
 Find your focus point first. Re-compose. Then shoot.
The Santa Claus in the picture on the right is blurry because the camera focused on the background in the middle of the photo.The Santa on the left is not blurry because I pre-focused on him first, then re-composed the picture in my camera's viewfinder and made my exposure.
Be observant of any objects in the foreground of your picture that might trick your camera. Take responsibility for pre-focusing or re-composing to avoid the blurriness mistake from inaccurate camera auto-focusing.
Improvements in auto-focusing mechanisms in cameras have helped dramatically, but understanding that the camera can't "think" as well as you can will help you avoid or overcome the situations that cause blurry pictures.
how to avoid the focus blur
You can tell when the camera is struggling with focus because there is a long delay when you press the shutter button and you can often hear the lens's focusing mechanism constantly searching. Using manual focus is the best solution to fix blurry pictures resulting from auto-focusing failure.
If your camera is making the mistake of focusing on the wrong part of your subject, use pre-focusing. Pre-focusing is aiming the exact center of your camera's viewfinder at the part of your subject you want in perfect focus, then pressing your shutter button half-way down to pre-focus, and finally re-composing the photo and pressing the shutter button the rest on the way down to make the exposure.
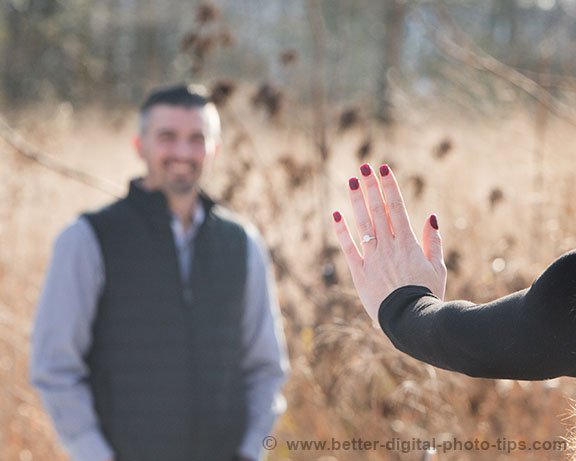
Here's a great example of a creative way to use focus blur. Check out this engagement photo.
This technique to purposely blur the background can make your photos stand out from the crowd. Here's the post showing examples of intentionally blurring part of the background with a narrow depth of field.
If it is moderate or severe focus blurriness, it's much more difficult to fix. I've had lots of success in fixing digital pictures that are just slightly out of focus. If your photos are severly out of focus, you're screwed abd you should just delete them and learn from the experience.
I learned an expert technique from Scott Kelby's book on using Photoshop for sharpening and I use that extensively when I have. It's too lengthy and in-depth for this article, but it's good if you want to invest in professional editing software to fix the blur.
If I miss the focus a little, it is often because I like to use a very shallow depth of field for portraits of individuals. I shoot with a long telephoto len set at a wide open aperture so that the range of things in focus in quite small. I do this purposely to throw the background out of focus but it makes the placement of exact focus on the eyes critical.
How to fix blurry digital photos with software

Focus Magic is software that tackles both kinds of blur.
In particular its strength seems to be when fixing blur from slight camera movement. Focus Magic can be used as a plug-in in Photoshop as well as with other image editing programs.
You only have to buy the software once. Acclaim software, the company that makes Focus Magic lets you upgrade each time they improve the software. If you get a new computer, you just ask them for the new registration code. The first version was released back in December of 2000. It wasn't very good software at that point. Since that time, Acclaim Software has
- reduced the "digital noise"
- reduced the computer memory used
- reduced the "halo" effect
- improved its speed
- lessened the "water color" effect
Their website has useful tutorials on how to repair photos that are blurry from out-of-focus and motion-blur causes.

You can also download software called Blurity to fix blurry digital photos.
It can also remove small amounts of focus blur. Blurity has a FREE download of it's software. The free version puts an "unregistered" watermark on photo, but you can at least "try before you buy." If you like the results, you can pay for a registration key for the standard or for a pro version.
The Blurity web site has several blurry images that you can download and try the software on. On its features page, the site also does a comparison of features between Blurity, Focus Magic and Unsharp Mask in PhotoShop.
Fixing blurry photos with software can give you mixed results because each photo will have individual characteristics that will affect the repair you attempt. These factors include:
- The amount and type of blur
- Contrast and color
- ISO setting used on your digital camera
- Sensor size
- Lens
- Camera or software that was used to process the original image
- Exposure (aperture and shutter speed)
The Blurity site also has an on-line manual in its support section to help you better understand how to use the software. There is always the chance that the inexperienced user will over-sharpen the blur and get UN-natural results. It will take a bit of experimenting to get used to the software no matter how you are trying to fix blurry digital photos.
I hope you found this post. For related articles, you may find the following very helpful too:
Shutter Speed. You can avoid blur from camera movement AND subject movement by choosing the right shutter speed.
Steady Tripods. How to get the sharpest photos using a tripod.
Stay inspired! Bruce


ABOUT BRUCE LOVELACE
Bruce is the publisher of this website. He is the author of the book "Improve Your Photography Instantly." Read more on Bruce on his Bio Page. He's been known as The Traveling Photographer ever since 1994. Read more about this website.
View some of Bruce's photos on Instagram. Visit the Facebook Page. Watch him on YouTube. Bruce runs photo workshops for kids and adults, and provides one-on-one photography coaching.
Digital Photography Education Location on Google My Business
Blur the Background. Although we want to avoid taking blurry pictures, sometimes it is desirable to intentionally blur the background. Here are two ways to do this.
Photo Exposure Tips. Understanding the exposure triangle will really help you avoid common photo mistakes. If you want to get a better understanding of how shutter speed, aperture, and ISO are related to getting the right photo exposure, read this article.
Back from Fix Blurry Photos to Other Photo Mistakes
