HOW TO POSTS: LIGHTING AND COMPOSITION
how to avoid an underexposed photo
and how to fix dark pictures
There are 5 simple ways to avoid taking underexposed photos and dozens of ways to brighten them should you need to correct dark photos that you've already taken. First, let's dive right in on how to sidestep dark photos in the first place.
 Underexposed Photo
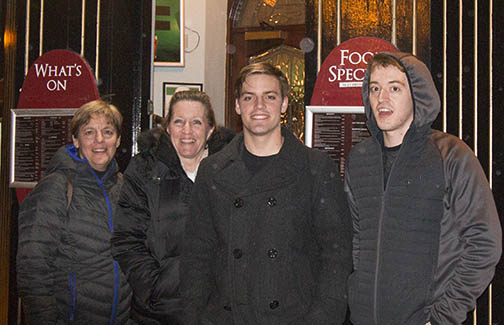 Underexposure Fixed
how to avoid underexposure
- Use your camera's exposure compensation feature.
- Add light to your subject.
- Change the ISO setting on your camera.
- Open up the lens aperture more.
- Slow down the shutter speed.
Let's dig in a little deeper to each one of these fixes for avoiding underexposed images.
1. fix your photo with exposure OVERRIDE
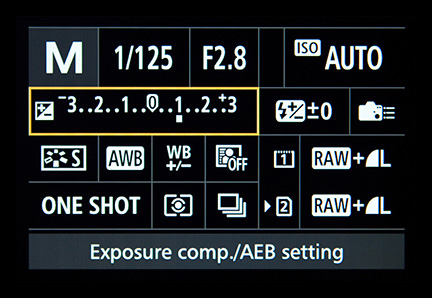 One f/stop of exposure added.
You can override your camera's exposure settings using a feature called exposure compensation. This is usually the easiest way to add or subtract exposure to your photo.
It's done either on the LCD screen on the back of your camera or by another dial on your camera. Check your camera manual for specific directions for your camera.
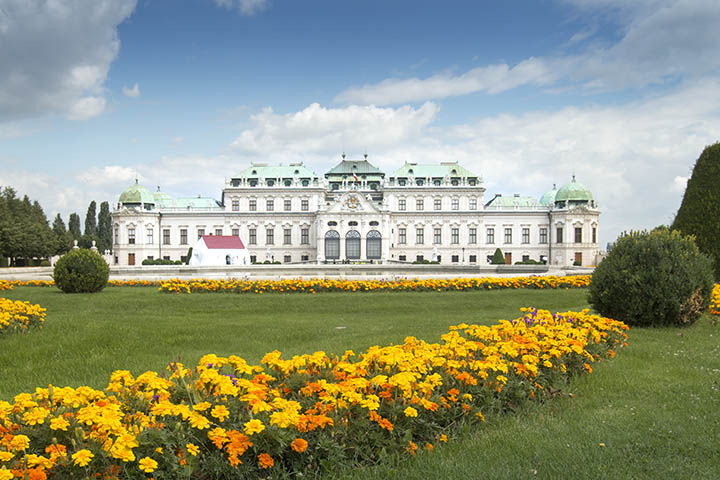
You can use the exposure compensation adjustment along with any of your camera's exposure modes. Each f/stop of compensation doubles the amount of exposure your photo receives. In the photo below of the Bundesgarten in Austria I added 2/3 stop of exposure to a avert a dark photo.
2. overcome the darkness by adding light
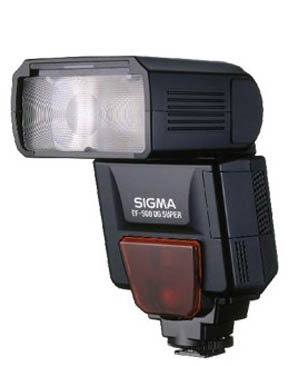 External flash
The easiest way to add more light is to use your flash, either the pop-up one built into your camera or an external flash that attaches to the hot shot on the top of your camera.
There are other instances where you can bounce light back into a scene using a large white reflector. This is a bit more cumbersome for many situations, but it's what I do when my portrait subjects face is in shadow and will come out underexposed.
A third way to add light involves either moving your subject to a better lit area or if it's feasible shooting the photo at a different time of day. There are more in depth posts on this website about lighting that you are welcome to explore.
3. add exposure by changing the ISO setting
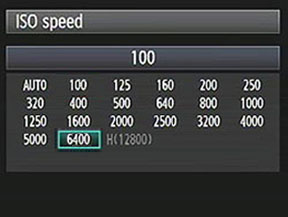
You can change how much light your camera needs to get the right exposure. Setting the ISO number to a higher number means your camera's sensor has more sensitivity to light.
Keeping all other settings the same, this will brighten your photo and prevent underexposure. There is a trade off though, if you set your camera ISO setting to an extremely high number. You may get too much digital noise, or a lack of sharpness that won't be acceptable. It's a subjective thing and you'll learn what you like and don't like with a little experience at changing ISO.
The next two ways to avoid underexposing your photo involve you taking a little more control over your camera settings.
4. open the window wider
What window, Bruce? Think of your camera as a completely dark room with no light inside, just one window that can open and close. The size of that window is like your camera's aperture. If you open it wider, you're going to let more light in and brighten the room more than if it's a small window.
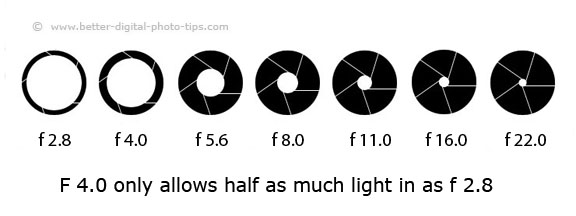
You can change your camera's aperture to a wider opening to let more light into your camera and avoid under exposing your photo. The tricky part is remembering that you can't do this with your camera in an automatic mode.
If you're in aperture priority mode-which I call a semi-automatic mode-you set the aperture lens opening and your camera will choose the shutter speed that it calculates should be the right speed to give you a good exposure.
Changing the aperture to prevent getting an underexposed photo works great when you're shooting in manual mode because the shutter speed will remain constant.
5. brighten the exposure with more time
This is the alternative to changing the lens opening manually. Let's go back to your camera being like a dark room with one opening. If you leave that window open twice as long, then twice as much light has entered the room.
As an example, if you change the shutter speed from 1/60 second to 1/30 second, you are doubling how long the window stays open. Twice as much light gives you twice as much exposure.
 These are typical shutter speeds (in seconds) that your camera can use.
Moving to the right, each step is doubling the amount of light entering the camera.
While it's much better to avoid taking an underexposed photo to start with, it does happen. Getting a good photo exposure is more desirable because it assures you of the best quality photo. If a picture is only slightly too dark, you can often correct it to an acceptable level.
fix your underexposed photo with software
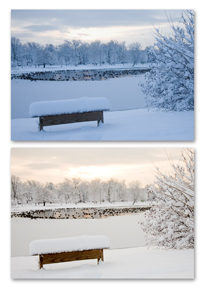
Fortunately, there is an abundance of software to help us when we do our photo editing. It's not too hard to fix a picture that is only slightly too dark. In this example illustration, the top photo was taken using an auto exposure setting on the camera.
Auto exposure assumes that the subject is an average scene with a mix of some light and dark areas. For the snow scene, most of the photos should be very bright, close to a pure white brightness.
If the camera had been set to overexpose an f-stop or 2, the photo would have actually been exposed properly.
The lower photo was adjusted for exposure and color temperature in Photoshop. You can see it is brighter and a more desirable color. Photo Editing software: Gimp is a free program that you can download from www.gimp.org.
how to tell if your photo is underexposed
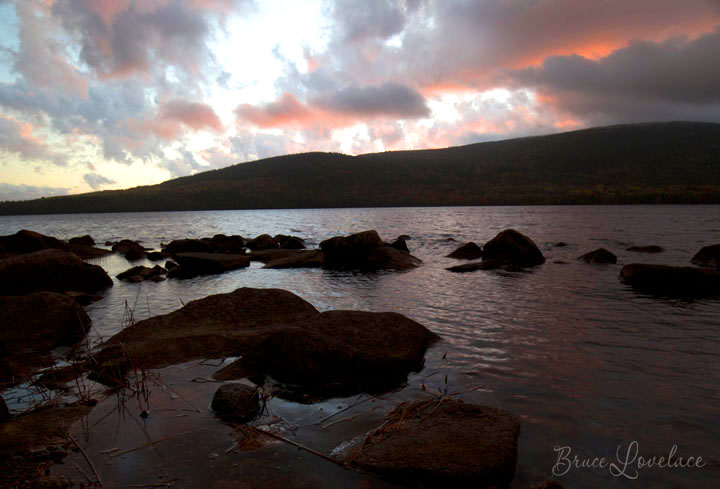
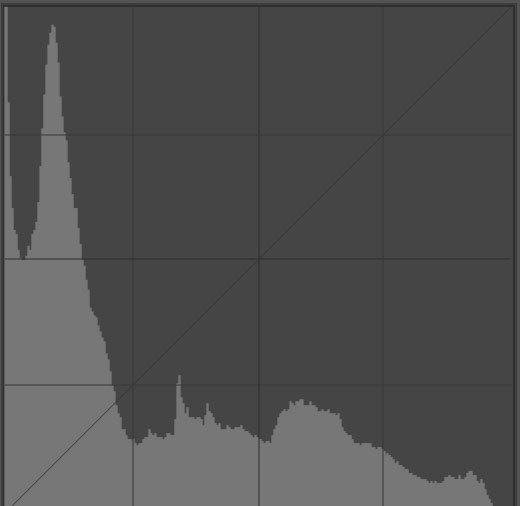 Histogram of sunrise photo below
There are times when it's easy to tell that your photo is underexposed and other times when it's hard to tell. There are 3 ways to determine if your photo needs help.
- The Captain Obvious way that it simply looks really dark and you can't see everything that you wanted to when you took the photo.
- The details in the shadow areas of your composition can't be distinguished, are totally black, or appear "muddy."
- You look at the histogram and it's too far to the left.
Check out the photo below from a recent trip to Acadia National Park, that at first glance, appears to be underexposed, but is it? Look at the sky. There the highlights are actually blown out.
This landscape scene appears to be underexposed because of the silhouettes of the rocks and the mountains. If I had increased the overall exposure to avoid the underexposure in the dark shadow areas, the details in the sky would be "blown away" and the clouds would lose their appeal. This is simply a high contrast scene that has large areas of black.
how to correct your underexposed photo
Depending on how good it is, the software that came with your camera is usually simple to use and will do a good job in many situations. The only hard part of course may be learning more new software.
Many have an auto correct button that will analyze your dark photo and make adjustments with one click. I am not a big fan of them as I like complete control over highlights, shadows and midtones. Most people will have good success with these. I use Adobe Lightroom when processing large numbers of images and Adobe Camera RAW to process one or two at a time as I did in the example below.
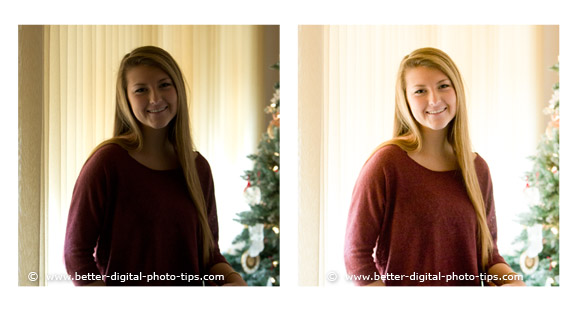
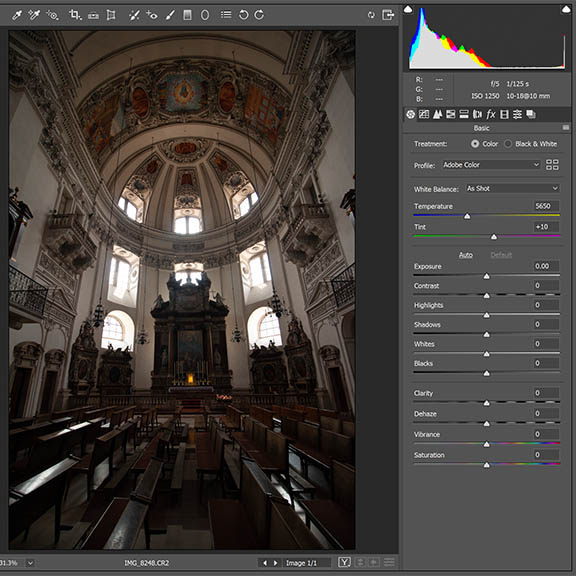 Original Exposure
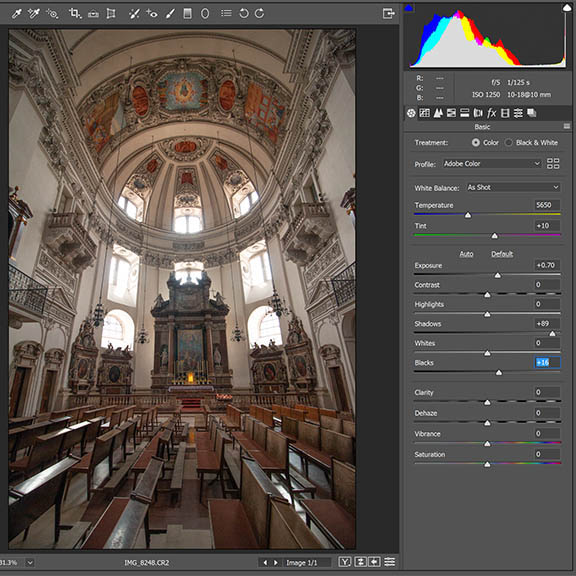 Edited in Adobe Camera Raw
The camera's meter was "fooled" by the brightness of the windows above and resulted in an underexposed photo. I shoot everything in RAW mode and easily adjusted by adding about 2/3 of a stop of exposure. Shooting in Raw mode is a great way to protect yourself against underexposure, overexposure, poor color balance and lack of sharpness.
In the photo below, I really like the curtains as a background when photographing this high school senior at her grand mom's house. There was very strong back-lighting coming through the curtains and very little other light in the room.
This fooled my auto-exposure and the result was a high contrast, underexposed photo. I did this fix in PhotoShop raw software.
I added about a half f-stop of exposure, adjusted the brightness tool upward, and added fill light to get the image where I wanted it. I did have a large white reflector off camera to the right to help provide some fill light, but it was not enough and I needed to the adjustment tools in the software to help.
There are at least 3 common ways to adjust a dark photo in most of the traditional photo editing software programs:
3 ways to fix a dark photo with software
It can get confusing when it comes to correct a dark photo with software. There are several different ways to lighten your image and they each work in a different way.
- Exposure. Exposure Sets the overall image brightness, with a greater effect in the higher values. Adjust the slider until the photo looks good and the whites are at the correct amount.
- Brightness. Brightness adjusts the image brightness mainly in the mid-tone levels. Set the overall tonal scale by setting Exposure. Then set the overall image brightness. Large brightness adjustments can affect shadow or highlights.
- Contrast. Contrast is the range of dark to light. Try a few combination of adjusting the exposure and contrast to get the desired effect. The biggest editing mistake is adjusting contrast too much.
Some software has automatic exposure correction as the click of one single button. Getting the best photo exposure is the ideal thing to do. If our photographic image is not too far off from the desired brightness, we can use a variety of techniques to correct our underexposed photo.
what if your flash photography is underexposed
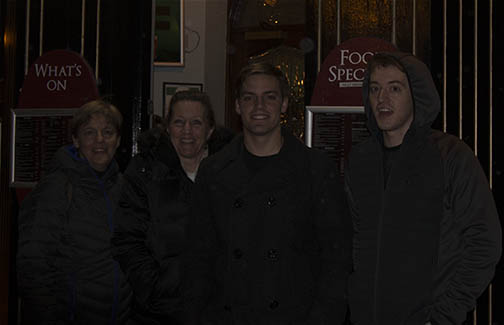
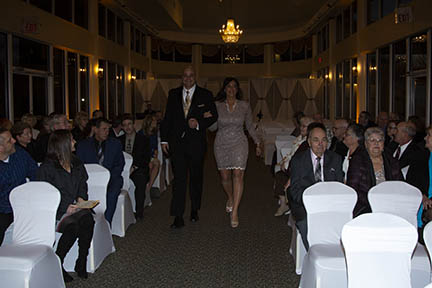 Underexposed From Weak Flash
You take a quick glance at your LCD screen after you take a picture with flash and zoinks, it's too dark! You can usually tell right away that your camera has let you down or that you may have made a mistake in setting your camera.
The most common reason for an underexposed photo is that the flash was not bright enough to illuminate your subject or it simply didn't fire at all. Built-in flashes in point and shoot cameras have a limited range and won't light up a subject that is too far from your camera.
- Make sure your flash is not blocked by anything when you shoot (like your finger).
- Adjust your flash setting if you can, by adding an f/stop or 2 of compensation.
- Check to see if you can raise the ISO setting.
- Get closer to your subject.
Using any one of these techniques may help you avoid getting an underexposed photo while using your flash and you won't have to edit in software afterwards.
Shoot more photos. Shoot better photos.

ABOUT BRUCE LOVELACE
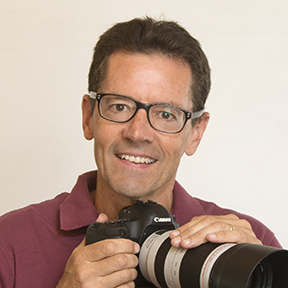
Bruce is the publisher of this website. He is the author of the book "Improve Your Photography Instantly." Read more on Bruce on his Bio Page. He's been known as The Traveling Photographer ever since 1994. Read more about this website.
View some of Bruce's photos on Instagram. Visit the Facebook Page. Watch him on YouTube. Bruce runs photo workshops for kids and adults, and provides one-on-one photography coaching.
Digital Photography Education Location on Google My Business
