HOW TO POSTS: LIGHTING AND COMPOSITION
Phoitography Composition Techniques
You can use these 10 simple photography composition techniques one at a time, or combine a few of them, and improve your photography dramatically. This post will also cover the 12 elements of composition for you to look for when you take your photos.
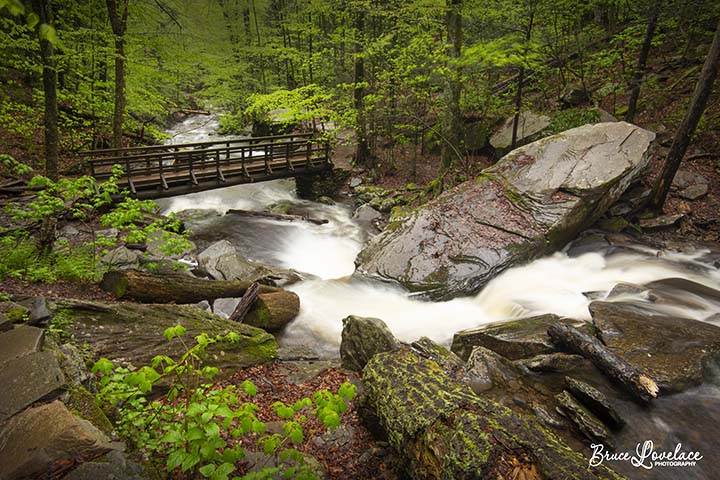 This vantage points creates a composition where the shape and direction of the flowing water leads the viewers eye to the main subject, the bridge across the waterfall. Ricketts Glen PA.
10 Photography Composition Techniques for you to use right away
You've got a decent digital camera, but now you want to figure out how to take better photos with it. Let's be honest.
Just because you have a you've got a DSLR camera or a sophisticated camera built into your smartphone you should realistically know that you aren't going to instantly turn into an award-winning photographer overnight.
 Your Award
Let's face it. It's going to take a little bit of knowledge and maybe a little bit of practice. This article is going to help you a lot with the first part and you can take care of the second part at your own pace.
Pour your favorite beverage, get comfortable in your seat, and let's dive in. We'll start with a quick peek at what elements go into a successful photograph. Here are delicious dozen elements for you to taste.
12 Elements of Composition in Photography
Here are the delightful dozen, the 12 elements of composition in photography that you want to be aware of. Don't try to memorize them. Just glance each one for a second and you'll get an idea of the different aspects of composition that can come into play when you are creating a photograph. You'll find that each photo you take may have several of these elements of photography composition included in it.
1. perspective in composition
The position of your camera, whether you shoot vertically or horizontally, how high you hold your camera, the angle you choose, and the lens zoom setting all affect the perspective. Tip: You can try this with most subjects you photograph and you will see how much changing your perspective will change the photograph.
 Dramatic Change in Perspective
I put this one first because it's one of the fastest ways for you to make a remarkable difference in how your photo comes out.
Look at the dramatic change that you can get in a photo when you change your perspective. Amazing, isn't it? This is the same collection of statues photographed from two different vantage points. These are not prized photos, but stay with me for a second.
After taking the photograph on the left, I came in closer, moved to the right, lowered the camera and zoomed out to a wide angle lens setting. The relative sizes of the objects in the photo, the background, and the composition are all changed by using a different camera perspective.
You're in control of how to choose a specific perspective to create the effect you're after. Try an unusual perspective and look at the type of photo (see below) you can come up with.
This little guy was quite content after his feeding and I couldn't resist snapping this image with my cellphone.
2. textures
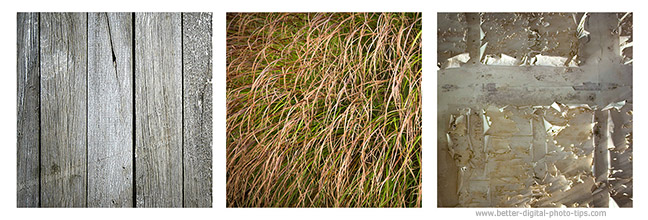
Think of textures as the small details on the surfaces of the objects in your photograph. You can take photos of objects where the main subject is the texture itself and sometimes photos like this become abstract photos.
The best way to bring out textures is to have lighting that comes in from a sharp angle. Some of the most unique photos have a common texture repeated throughout the photo with a few areas in the photo that contrast with the predominant texture.
This is one of the photography composition techniques that is a little geeky. So what! You want to have fun with this and playing around with textures does give you visual exercise.
3. patterns
Patterns often tickle our visual taste buds. They're simply details like shapes or sometimes textures that repeat in a rhythmic way. The photo below has patterns, shapes, colors, balance, and contrast all contributing as elements in the photograph.
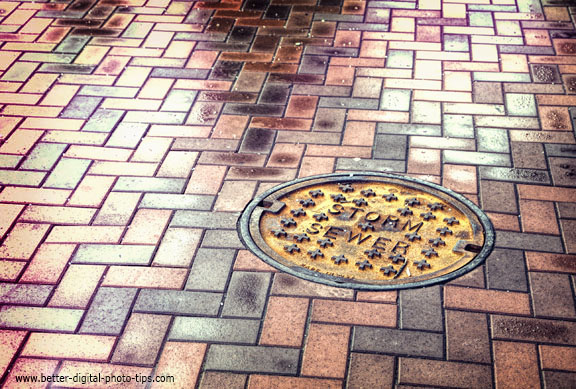 Brick Pattern and Storm Sewer Lids
4. colors in your composition
Color seems like an obvious important element, but sometimes we tend forget to scrutinize it when we have an already interesting subject to photograph. You shoot almost all of your photos in color. The colors that you include or purposely exclude in your composition are very important to pay attention to.
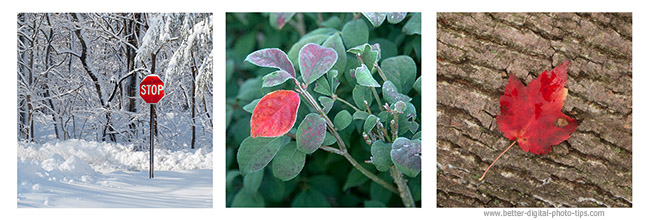 Look for just a touch of color to contrast
You can use just a "touch of color" in your image to create an interesting image, like the photos below, or follow a color theme to set a mood for an image. Colors can work for you or against you in every photo you take.
5. symmetry
Contrasting with using composition rules like the rule of thirds or the golden mean, you can use symmetry to create an intriguing image. The definition of symmetrical balance is balance that is achieved by composing with elements on either side of the center of a composition in an equally weighted manner.
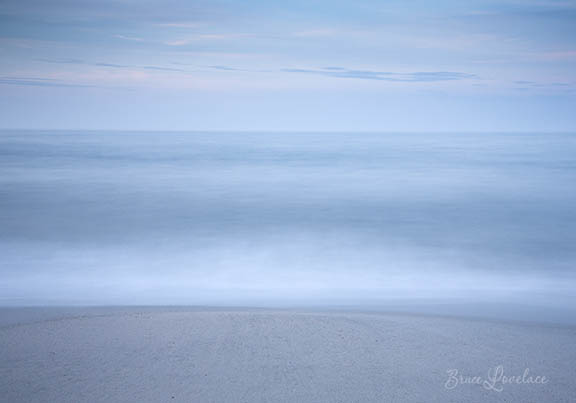
This photo of the seascape is a good example of an image that has a symmetrical composition. Coincidentally, it's also an example of the rule of thirds. It's a 30-second long exposure of waves on the beach.
The lighting was subtle, but I liked the photographic composition because of the simplicity.
6. balance
You control the balance by selecting what elements to include and where to position them within your composition. This is one of the photography composition techniques that is kind of a gut feeling, but you still need to be aware if your photo is visually weighted on one side or the other.
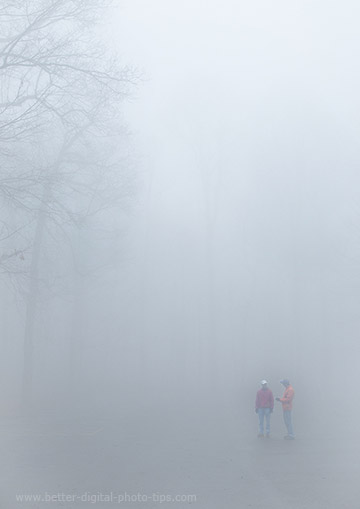
This foggy photo is balanced. The ghostly figures on the right and the trees on the left create an equal amount of "visual weight" to both side of the photo.
As you experiment with this, or purposeful unbalance, you can use the principle of balance to emphasize one or more parts of the photo. This is a side to side balance example, but you can also use this in the top and bottom areas of your image too.
7. framing
Framing your subject within the borders is one of the photography composition techniques you can use with landscape and architectural photography.
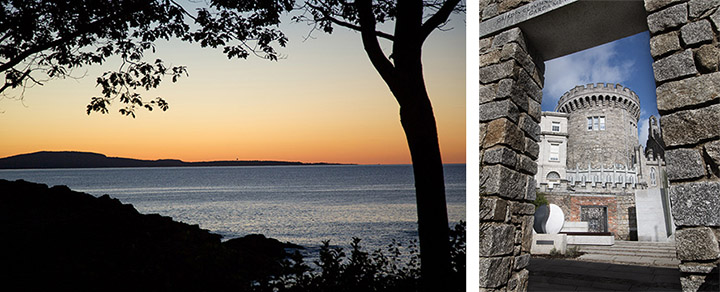 Two examples of how you can using framing within your frame
In the sunrise photo, the sky is framed in by the silhouetted rocks in the foreground and the tree branches in the top of the photo. Here's a more detailed exploration into using framing in your composition.
8. lines
Lines have the power to give your eye a path to the most important part of your photo. If you use them incorrectly, they can lead your eye out of the photo. Diagonal and curved lines are most commonly used.
You'll find a lot of diagonals all around you, particularly if they're man made, such as landscaping and architecture. A general rule is that you should not have lines that go from one edge of your photo to the other, whether side to side, up and down, or diagonal. These full length lines tend to dissect your photo into separate parts.
9. Depth
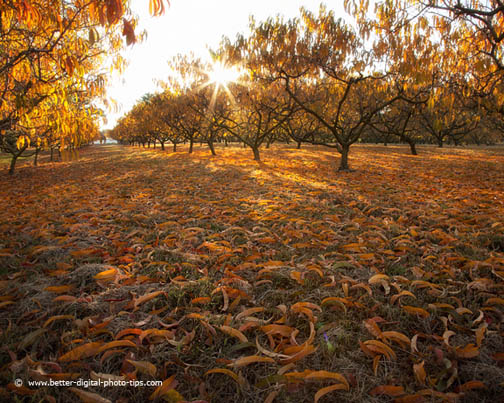
Depth can be enhanced by lighting and by strategically including objects at different distances within your composition. When you compose an image with objects both close and far from the camera, it gives your eye a place to travel.
With the photo above of the peach orchard, I set my tripod up for a very low angle. I used a wide angle lens for 2 reasons. I wanted to get achieve a deep depth of field as well as create a strong perspective to emphasize the curled up leaves in the foreground.
10. Space
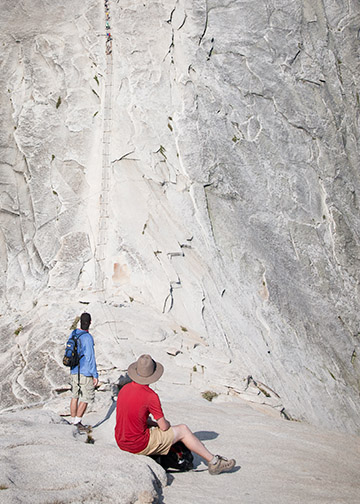 Approach To Half Dome
It's a bit abstract but the definition of positive space in the subject itself within your photo. Negative space is the area surrounding your main subject and can be a great positive element in your image.
The use of negative space is popular with minimalist photography, where you include a minimal amount of subject matter within your composition.
The challenge is to get a natural balance between the negative space and the positive space in your image. It can be tricky and it's takes a little experimentation to get it just the way you want. You can add emphasis to your main subject by using negative space and eliminating clutter that can distract your attention.
11. shape
You should pay attention to the overall shape of your main subject and how it relates to the overall outside dimensions of your photograph. Here's a classic example of a roundish shaped main subject.

You can purposefully overlap people in a group pose to make them form a solid shape. In this pose I posed the tallest subjects in the middle and placed the shorter subjects toward the outside. Whether you call this a pyramid shape or a teardrop shape, you can use this technique for small group photographs.
12. Focus
You can control the viewer's attention by selecting the right focusing point as well as achieving the appropriate depth of field by using the right lens aperture.
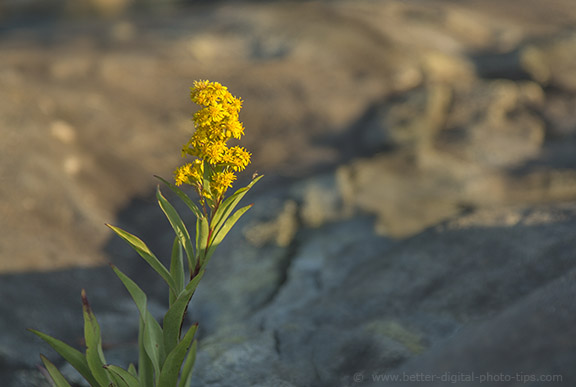
I manually focused the lens on the flower, set my camera to an aperture priority setting, and selected f/4.0 for an f/stop. Note that I also used the element of "negative space" to make the main subject stand out even more.
Top photography composition techniques - The top ten composition tips
Before you dive into the specific composition techniques, decide what do you want to capture. What is the message or the story, or the main subject in your photograph? Decide ahead of time what you want your photo to be about. It's up to you to decide.
I get it. It may be just a fun attempt to emphasize geometric shapes or perhaps colors. Your picture may be to create a photographic record of a special event. You may be trying to capture a beautiful landscape or striking architecture. You are the creator of the photo so you want to control what it emphasizes. Here are the top 10 photography composition techniques.
2. Control focus and depth of field
5. Look for Lines
9. Try different perspectives
7. Keep it balanced
1. Pick the right format
10. The rule of thirds
8. Create Depth
6. Fill the frame
4 .Shapes and textures
3. Try symmetry
1. pick the right format
It's an easy element to overlook and it's likely one of the biggest mistakes the beginning photographer makes. Your camera has a rectangular frame. That means you always have the choice of shooting vertically (portrait) or horizontally (landscape)
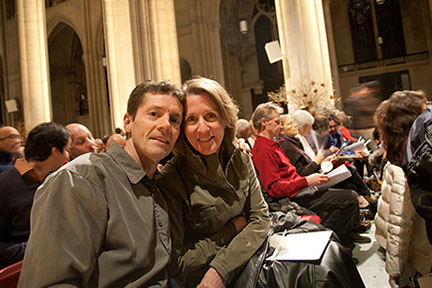 Horizontal
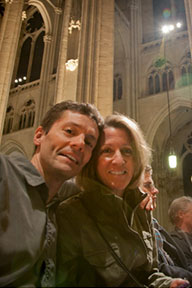 Vertical
Cameras are setup to hold, make setting adjustments, and shoot horizontally, so we often aim and shoot without considering holding the camera in a vertical orientation.Check it out. Compare the backgrounds and the overall compositional differences in these two photos. Don't limit yourself by automatically holding our camera in the horizontal or vertical position.
Have fun experimenting with these photography composition techniques each time you pick up your camera. It costs you nothing but a few seconds of your time. You are guaranteed to improve your photography by just shooting a few variations every time you practice a few compositional tactics.
2. control the focus
Decide what to focus on. You're in charge. Don't let the camera's autofocus automatically choose what's sharp and what's not.
You can pick the focus point. You'll can either focus manually, go into your camera's menu and adjust the focus point, or do it on the back of your camera if you have a touch enabled LCD screen.
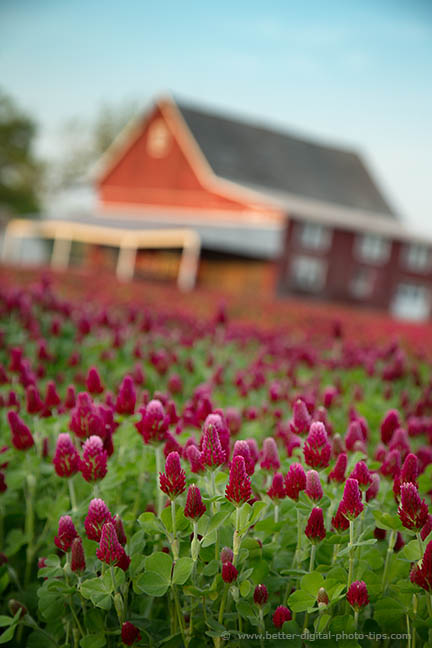
When I photographed this red barn I tried 3 different techniques in my composition. With the first method, I used a tiny aperture to get everything in focus. The second and third version I set my lens wide open to a narrow depth of field. In this photo of the red clover, I focused on the flowers and allowed the barn to go soft. This is the composition I like the most.
In the final version I focused on the barn and the clover in the foreground was blurry and I felt that it distracted from the image rather than enhanced it.
3. use symmetry in your composition
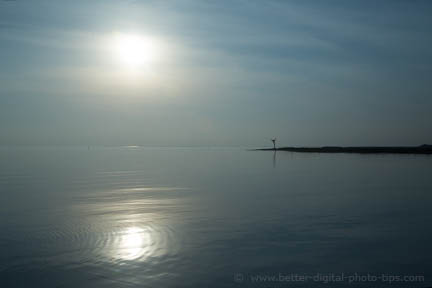
Our brains have a natural tendency to like symmetry. We saw before that symmetry is one of those 12 elements of photography you should be aware of. You can find both vertical or horizontal symmetrical situations to photograph. Photographs that include water are often a good subject to compose using symmetry as a technique.
It was hazy, hot, and humid, with no breeze and the giant Jersey Devil mosquitos were swarming, but I knew I had to persevere through the conditions after driving an hour to this location. I rarely compose a photo with the horizon dividing the photo into two halves, but in this composition I used the technique of symmetry on purpose.
4. Look for geometric shapes and textures
Rather than photographing an entire scene, try a few compositions that are a little more abstract by seeking out subjects based on geometric shapes or repeating textures. Shapes and textures are two if the elements of composition we touched on earlier.
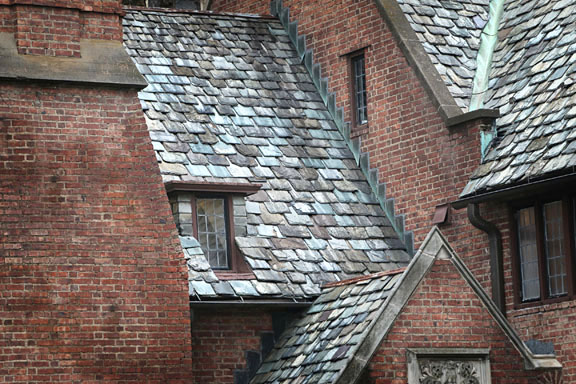 "Penn State Building Abstract"
5. look for leading lines
When you shoot architecture and landscapes in particular, include curved or diagonal lines to lead the viewer's eye into the photograph.
6. Fill your photo frame
It drives me nuts when I see wasted space in photos. Yeah, I know sometime it's okay to have "negative space" included in your composition, but let's not leave wasted space in your composition. Use your zoom!
 Too much wasted space
 Filling the frame is better
Zooming in and filling more of the frame with what's important is a technique you should use to take advantage of using your camera's entire sensor. This gives you better image quality, rather than having to crop the image with software afterwards.
7. do the balancing act
Photos that are lopsided aren't as nice to look at as balanced photos. Find a perspective that creates visual balance, both vertically and horizontally within your camera frame.
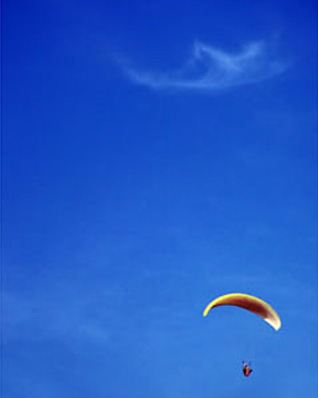 Unbalanced Composition
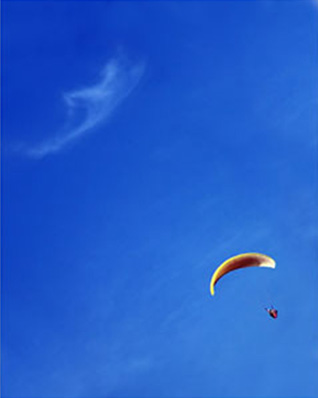 Balanced Composition
Sometimes it's just a matter of aiming your camera in a slightly different direction, but keep the subject matter basically the same. In this example above, since there was no horizon to add any confusion, compositional balance was achieved simply by tilting the camera.
8. add some depth

Whenever it makes sense, include something in the foreground as well as something farther away from the camera. it gives your eye a path to follow when you view an image.
Usually, not always, with this technique you need to use a lens setting that will give you good depth of field so that everything is in focus. Use shutter priority camera setting and set your f/stop number high.
Including the close-up position of tropical drink, the model's legs, the ship's guardrail, and the distant horizon give this photo great depth.
9. change your perspective
How does your choice of perspective dramatically changes your photograph? In several ways. Often we think of composition in photography as a set of rules to follow. Certainly, we've discussed rules, such as using balance, lines, and geometric shapes, and the rule of thirds is discussed last.
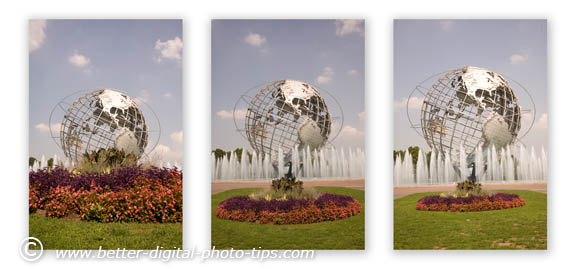
But what about using perspective to create your photographic composition. This technique is more often a feel you get that may be formed by other design elements, particular the relative sizes and shapes of what you include in your composition. Let's take a quick look at the three photos below.
- LEFT: Wide angle lens. Low camera position. Flowers emphasized. Fountains barely visible.
- MIDDLE: Normal lens. Camera farther back. Equalized emphasis.
- RIGHT: Telephoto lens. More distant camera position. Grass more dominant. Taller Fountains.
None of these are spectacular photos, but they are remarkably different because a different perspective was taken in each one of them. The silver colored "Unisphere" from the 1964 World's fair in NYC is the same size in each of these 3 photos. Notice the 5 subjects in the photograph and how their relative sizes to each other change.
The Grass
The Flowers
The Water Fountains
The Unisphere
The Sky
You can create these different perspectives by changing your position AND the by zooming in or out with your camera lens. Here's an example below of you can use a strong perspective as a technique in your composition.
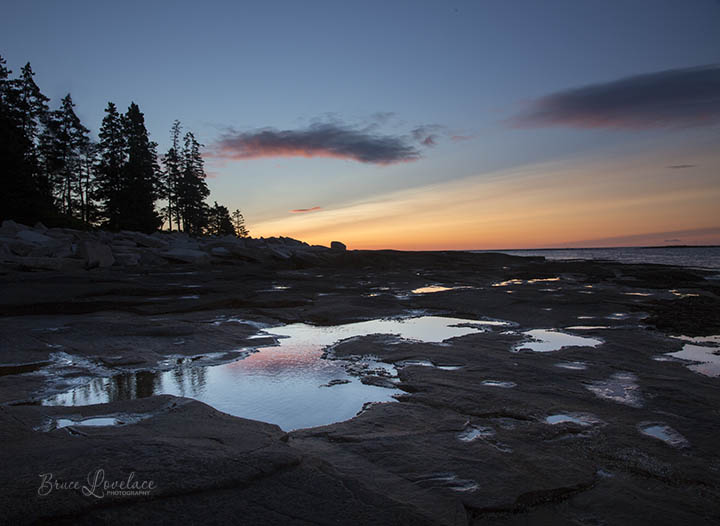
 Use a wide angle setting to emphasize nearby objects
The puddle in the foreground is actually rather small. I used a super wide angle lens (17mm) and took a very close position. This perspective makes the small puddle more prominent in the photo and I really found the reflection of that amazing sky fascinating.
Below is another simple comparison of photographs using 3 different perspectives of the same subject resulting in 3 different compositions. Look at the different backgrounds behind the doll.
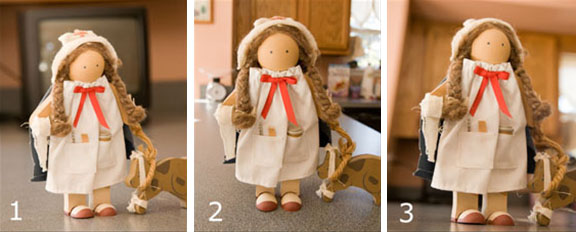 Control your background by changing perspectives
10. the best rule of composition for beginners
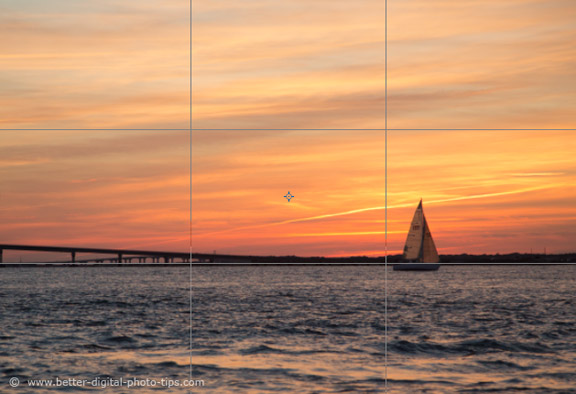
Some composition rules are made to be broken, but if you understand them, you'll have a lot more success in taking pictures with good composition. I saved the rule of thirds for last because it's the easiest to use. Here's a quick example and a link to a more in depth post on using the rule of thirds as a composition technique in photography.
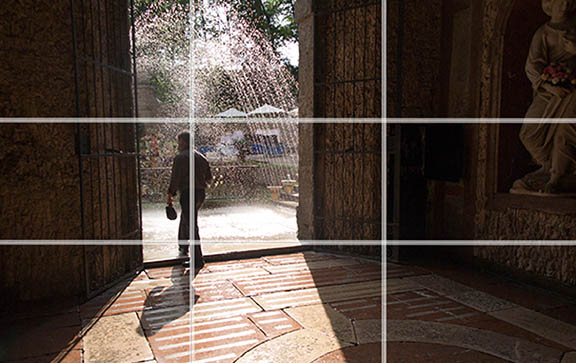 The Rules of Thirds
The brief explanation of using the rule of thirds as a method to compose your photograph. Here's the simple two step rule of thirds technique.
- Use your imagination to divide your photo into thirds, both vertically and horizontally.
- Place your subject or center of interest along one of those imaginary lines or at one of the intersections of those lines.
For a more indepth coverage of this technique read the rule of thirds post here.
Keep shooting. Keep learning. Keep improving.


ABOUT BRUCE LOVELACE
Bruce is the publisher of this website. He is the author of the book "Improve Your Photography Instantly." Read more on Bruce on his Bio Page. He's been known as The Traveling Photographer ever since 1994. Read more about this website.
View some of Bruce's photos on Instagram. Visit the Facebook Page. Watch him on YouTube. Bruce runs photo workshops for kids and adults, and provides one-on-one photography coaching.
Digital Photography Education Location on Google My Business
