HOW TO POSTS: LIGHTING AND COMPOSITION
how to photograph waterfalls
(Use These 3 ideas to take great waterfall photography)
This post will give you 3 important things to know about on how to photograph waterfalls. If you're like most people you've been disappointed with the waterfall photography you've done in the past. I've struggle too.
We're going to cover 3 ideas, in detail, to help you improve every single photo of waterfalls you ever attempt.
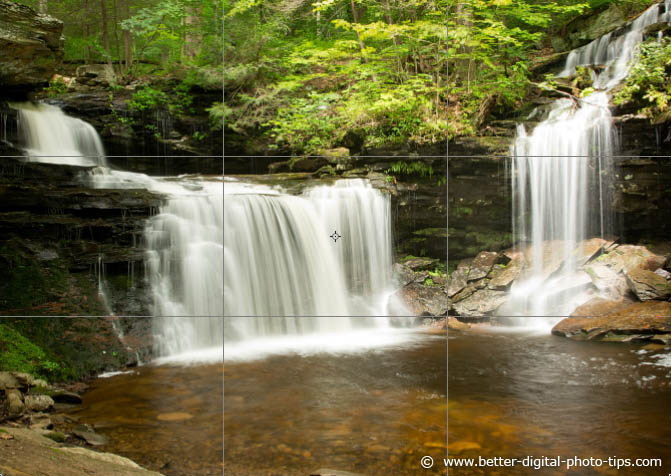
- I waited for a cloud to move into position soften the sunlight for pleasing LIGHTING.
- I combined a slow shutter speed with a small lens aperture to get the right EXPOSURE.
- In this first waterfall photo I used the rule of thirds as a tool to guide my in the COMPOSITION of the scene in front of me.
3 things to focus on
You'll need to address:
- LIGHTING. The way you control lighting is by choosing the best time of day and the time of year. The difference between a great waterfall image and a crappy one is often determined by the time of day and the way the daylight is revealing the details of the waterfall.
- EXPOSURE. Setting your camera to AUTO-exposure setting is sometimes the worst thing to do. Your camera's internal meter can easily get fooled by the whiteness of the water or the darkness of the wet rocks and give you an underexposed or overexposed image.
- COMPOSITION. Perhaps this is a skill that comes naturally to some photographers, but you and I have to work at this skill by taking a few subtly different views of the waterfall and learn from comparison which is the best perspective to take and why.
As with most photography, the how to photograph waterfalls method centers around the three most important elements of photography, exposure, composition, and lighting.
Many advanced photographers can call me Captain Obvious on that tip, but it's important to remember the basics before you go for advanced techniques with your photography, no matter what level of photographer you consider yourself.
1. proper exposure for waterfall photography
The most common mistake in waterfall photography is over exposure of the water itself. We all like to have that"set it and forget it" type of mentality.
The problem is that your auto-exposure camera settings can misread the situation. The dark areas of the scene fool the camera's meter into adding more exposure to you image and the light waterfall gets overexposed.
Another challenge occurs when you have direct sunlight striking cascading water. That makes for a very bright situation and it's very difficult for the camera's sensor to capture the contrast correctly.
EXPOSURE TIP: Using exposure compensation or setting the exposure manually are the ways you can correct for your camera's shortcoming. Looking and understanding your camera's histogram is a smart ways to improve your ability to handle waterfall exposure just right.
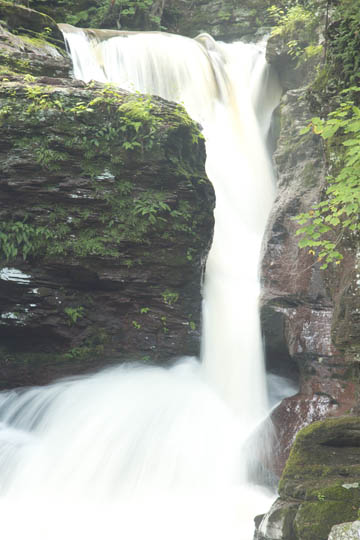 Overexposed Waterfall
The three factors that affect exposure are ISO, aperture, and shutter speed. How you set each one of them effects how you have to set the others. Together they make up the exposure triangle.
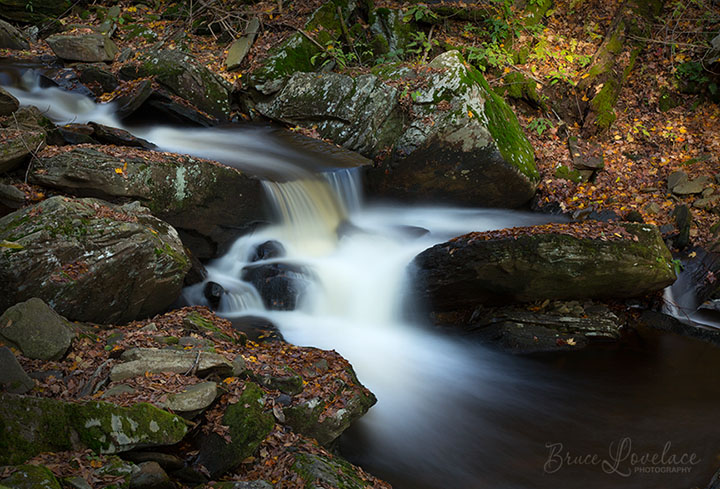
Controlling the shutter speed in waterfall photography is the most often talked about subject because of the beautiful results you can get by using long exposures to achieve that smooth, creamy-looking water flow.
 Exposure of this waterfall was f/22 for .6 second at ISO 160
what's the best SHUTTER SPEED for WATERFALL photography?
There are usually two different approaches to shutter speed selection. How fast the water is moving will change the exact speed to use, but generally here are two starting points to use as general guides.
- To freeze the motion use a minimum 1/200 second or faster for moderately moving water.
- For intentional water movement blur use 1/2 second or slower to get the right effect.
Compare the two different motion waterfall photos below and the different effects between 1/200 second shutter speed in the original and 1/2 second shutter speed in the 2nd waterfall photo. Move you cursor on and off of the photo to see a shutter speed comparison of two different effects.
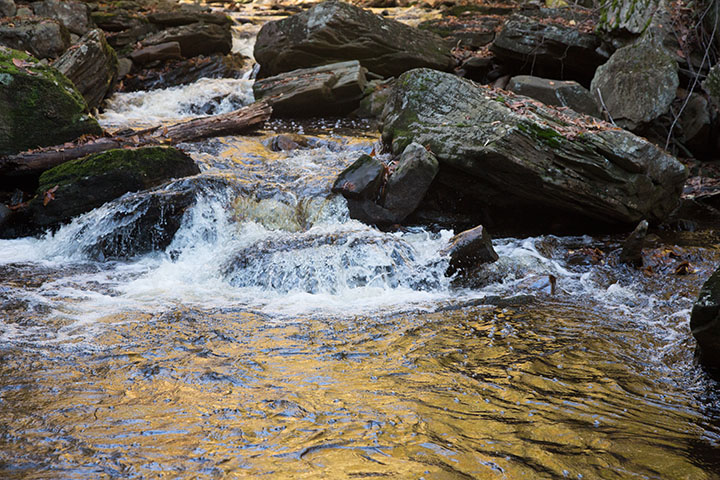
The composition itself doesn't really change too much, but look at the splash pool and the waterfall. They're remarkably different. The shutter was open 100x longer at 1/2 seconds rather than 1/200 second. Now look how creamy you can make the water look in the next photo.
You can also get a creamy effect when you shoot video on a slow motion (120 fps) video setting on your camera. I had a blast shooting some video of these same waterfalls. Check it out:
super creamy waterfall blur
This waterfall photo below had a shutter speed of 8 seconds to get this much motion blur in the water.
If you're only going to photograph a waterfall once during the year, the fall is your best bet for getting some nice color included in your photo. The spring is the best time for getting the most water flow.
2. best lighting for photographing waterfalls
The best lighting for waterfall photography is often on cloudy days. If your waterfalls is surrounded by trees and other vegetation, that'll cast shadows and produce un-even and contrasty lighting conditions.
Plan the timing of your trip to photograph the waterfall based on lighting. There are smartphone apps that can show you the exact position of the sun at any time during the day for any location.
More than anything else, you'll learn by simply taking a second to observe the direction and type of lighting your getting in various situations. Experience is the best teacher of all.
Good lighting situations also occur early in the morning or late in the day when the sun is low in the sky. If the sky is included in your waterfall composition than blue skies or white fluffy clouds give you the best situation for a nice image.
There are always exceptions to every photography rule so it's always pays to experiment and learn from the results you get in each situation. That's one of the greatest things about digital photography. Play around. Have fun. Learn from the ones you like and the ones you don't like.
3. how to get good waterfall COMPOSITIONS
You can improve your waterfall compositions in 3 different ways.
- Read a few posts on composition techniques. This is a great composition article to start with.
- Study waterfall photos and observe what compositional techniques were used to make it appealing to you.
- Practice, practice, practice sounds like a painful chore. Try "playing" around with compositions. Make it a challenge to take as many different perspectives as you can of each waterfall subject. It's amazing how much you'll grow as a photographer when you do this!
essential equipment and how to photograph waterfalls
- A tripod is an absolute must in situation where light is limited or whenever you are using a slow shutter speed to capture the blur of the rushing water.
- A wide angle prime lens or a zoom lens with wide-angle capabilities is very important to have in order to have a wide view in tight areas
- A Shutter cord or remote release. Even when secured on a tripod your camera will move slightly when you push the shutter button with your finger. If you don't want to use a shutter cord or remote trigger, you can always use your camera's self-timer function.
other valuable accessories for photographing waterfalls
AN ND (NEUTRAL DENSITY) FILTER. An ND Filter is a nice add on when you have too much light to use a long shutter speed. ND filters cut down the amount of light that makes it through the lens to you camera sensor. They're are great for taking very long exposures of waves on the beach in bright sunlight.
LCD SCREEN MAGNIFIERS, like the Hoodman HoodLoupe are great for viewing your camera's LCD screen when you are outside in bright light. They also magnify the screen to get a good look at your focus and sharpness.
other tips for photographing waterfalls
- Try some photos where your camera has an extremely low perspective and include some rocks or plants in the foreground. This type of composition creates depth in the photo, a path for your eye to travel into the photo.
- If you don't have a shutter cord or remote release, use the self-timer. This prevents accidental camera jiggle and a lack of sharpness in your subject
- Calm days without wind are better too. When you're using long exposure to achieve recording the motion in the water, the breeze will make the plants photograph blurry.
- Winter is a great time to get interesting patterns of ice and moving water. You must be cautious and properly equipped for dangerously slippery conditions.
BLACK and White Abstract Waterfalls
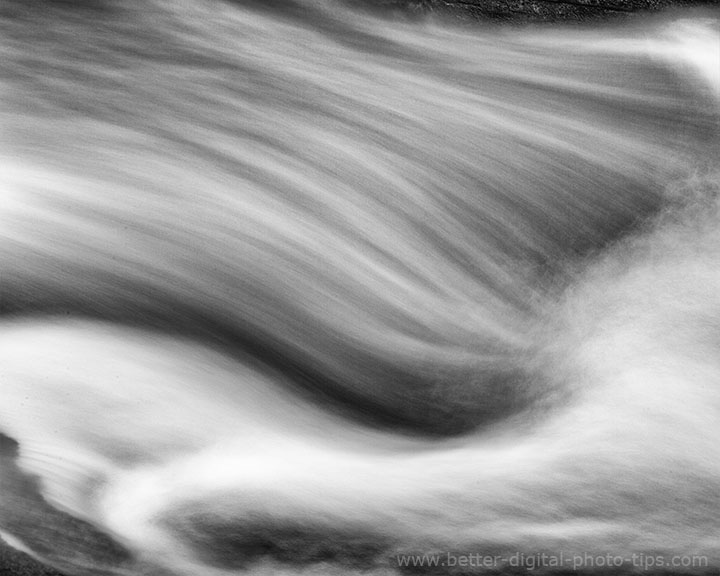
It's not the normal way to shoot waterfalls, but why not try and get a little creative with your photography. When you get back to your home computer try a few different ways to convert a few of your waterfall photos into black and white.
When you're first learning how to shoot waterfalls by using a long exposure, you'll often be surprised by the resulting photo. This black and white was just below one of the falls at Ricketts Glen State Park in Pennsylvania.
Have a blast learning how to photograph waterfalls! If you enjoyed this article called how to photograph waterfalls, please share it with a friend.
Keep shooting, keep learning, keep improving.


ABOUT BRUCE LOVELACE
Bruce is the publisher of this website. He is the author of the book "Improve Your Photography Instantly." Read more on Bruce on his Bio Page. He's been known as The Traveling Photographer ever since 1994. Read more about this website.
View some of Bruce's photos on Instagram. Visit the Facebook Page. Watch him on YouTube. Bruce runs photo workshops for kids and adults, and provides one-on-one photography coaching.
Digital Photography Education Location on Google My Business
Top Rated Waterfalls in The United States
Return to the How to Photograph...... Page
Return to Digital Photography Tips Home Page
