HOW TO POSTS: LIGHTING AND COMPOSITION
what is fill flash photography?
when to use fill-in flash
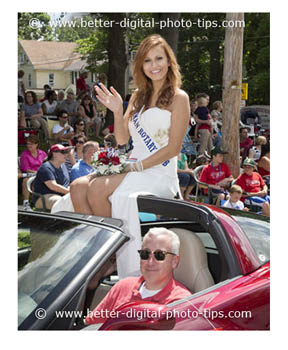 Strong backlighting
Fill Flash Works!
So you want to learn a little about fill flash photography. It's is one of the simplest ways you can dramatically improve both indoor and outdoor photos where the lighting isn't iluminating your subject properly.
This article will help you off to a good basic understanding of using fill flash. For many point and shoot cameras and DSLRs it's simply a matter of turning on the pop-up flash when you're in automatic mode. The sophisticated modern camera you have will do a real good job up to a point.
Every situation is different so it's best to set your camera in automatic mode, activate the fill-flash mechanism, shoot a test photo, and adjust it if needed. It's that simple.
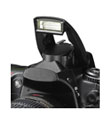
The biggest shortcoming in using fill flash with the built-in flash on your camera is that it simply isn't powerful enough to overcome the brightness of the sun. This is particularly true when your subject isn't super close to the camera. The fall-off in intensity of the brightness of your flash falls off exponentially as the distance between you and your subject increases.
fill flash photography defintion
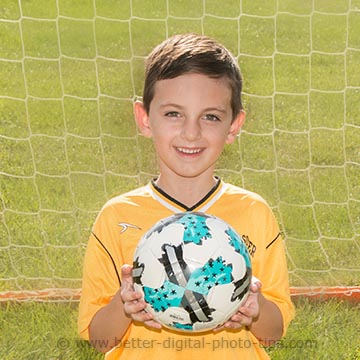 Full Power Fill Flash
What is fill flash?
Fill flash photography is a technique used to brighten the shadow areas of the photo so that the different brightness areas of the image are more balanced.
You'll get better details to show up in the shadow areas of your photo.
The most common situation it's used is with outdoor sunny situations where the background is a lot brighter than the main subject of the photo. It's used for taking pictures of people more than any other type of photography.
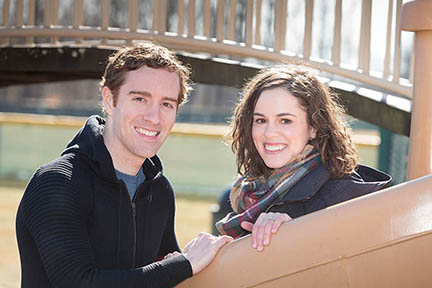
In this soccer portrait the sun was so bright I needed a professional speedlite to compensate for the brightness of the sun on the grass.
when to use fill flash with your photography
In situations when the light source is primarily behind your subject and in situations where the background is extremely bright, it is often advantageous to use the flash built into your camera or possibly an external flash as an add on.
Fill in flash is also good in some ways that aren't as obvious. When there is a strong overhead lighting situation, shadows can be cast under the eyes, nose and chin of your subject or even under the brim of a hat. Fill flash photography also adds a catch light or a little sparkling highlight in the eyes that adds life to your subject.
Your camera's automatic exposure system does what it can to give you a good overall exposure but it may do too good of a job exposing for the background or back lighting and leave your subject with dark shadows or not enough light on their face.
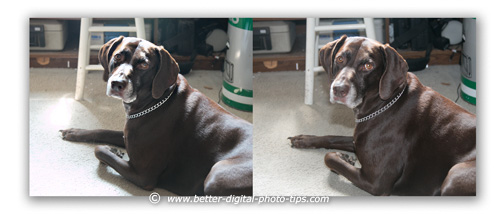
Look at the two photos of my dog watching me raise the camera to my eye. The light was streaming through a window into my office from behind her. In the photograph on the left, there are very few details in the shadow areas that are facing toward the camera.
I turned on my external flash (Canon Speedlite 580EX) on the photo on the right. Look at the huge difference in her eyes and her coat. The lighting equipment can be as simple as the built-in flash or a more powerful, shoe-mounted flash attached to the top of your camera.
Some photographers are worried about the damage the camera flash can cause to the animal. As I wrote in this article, the light from the sun is brighter than the light from the camera flash. Eye Damage From Camera Flash.
fill flash photography indoors
Here are two examples of fill flash photography where there is strong backlighting indoors. This situation often arises when there is a window behind your subject. I sat this teddy bear on our kitchen counter, set the camera on "P" Program mode, and photographed the bear with and without flash activated. Boom. Look at the difference.
 No Fill Flash
 With Fill Flash
Your camera is remarkably good at handling a variety of backlit subjects with fill flash. Sometimes there are instances when photos without fill flash are more appealing. It's one of those subjective judgements you make as the photographer.
In the fill flash comparison below, I actually prefer the photo of the candle without the pop-up flash activated. It has a little bit more of a soft mood to it, whereas the the candle on the right is a bit more contrasty. If I was doing some editing, I would just brighten up the exposure a little bit on the candle on the left. Which one do you like better?
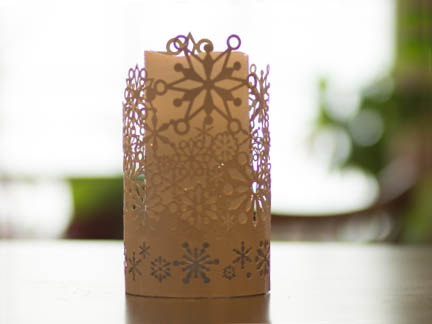 No Fill Flash
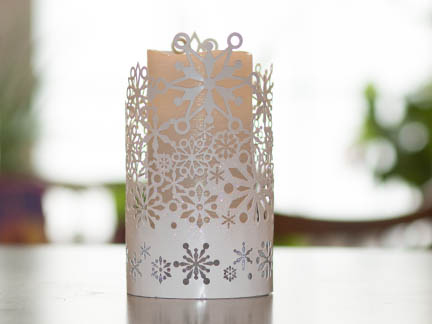 With Fill Flash
Another sometimes unplanned benefit of using fill in flash is that of added sharpness. In lower light situations, you camera may be using a slow shutter speed and you may get blurry pictures from the movement of your subject or your camera. Using a flash will "freeze" your subject and reduce or eliminate motion blur.
fill FLASH photography for group portraits
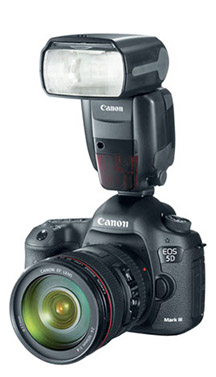
The family was taken with a pro DSLR and the fill in flash was provided by a powerful Canon Speedlite. Your camera's smaller, less powerful, built-in flash is more effective when your subject is fairly close to your camera and its flash.
This is especially true with most built-in flashes because they have a very limited output. Professional flash units like my Canon 580ex or Quantum td5 have plenty of light output to provide enough fill when shooting with bright sunshine.
Here's a good video on YouTube by Michael Andrews which does a good job of explaining and comparing without fill in and with fill flash photography:
My portrait photography background has caused me to have a reluctance to use fill flash with my portrait lighting. I get too picky because I make a living shooting "natural-looking" portraits.
That's just my personal bias and it goes against what most photographers like. Using fill flash for outdoor portraits works well.
For the large majority of photographers, a shoe mounted flash on the top of the camera is the perfect accessory for handling almost every flash photography situations.
Balanced fill-flash is just that, a balance of fill-flash light on the subject to match the subject’s exposure with the exposure of the other elements of the photograph, including the background.
If you have a decent LCD screen on your camera and you can adjust the flash to a higher or lower power setting, it's real easy to get the right amount of fill light. When I am shooting portraits I prefer to bounce light into the shadow areas by using a large reflector of some kind.
The biggest advantage of using the flash that's built into the camera is that it's always there and ready to go. it's just that it has such a limited range due to it's wimpy power.
There are a lot of Photography Lighting Systems available. Generally the larger they get, the more versatile and of course the more expensive they get. I once had to do a group photo of over 150 people outdoors similar to the family portrait below.
That was a situation where I need much more power than a battery operated flash could provide. I was able to set up my Novatron studio strobes and plugged into an electric outlet on the side of the house.

It was a definite situation where I had to practice my fill flash photography technique. Yes, most people use it for outdoor photography, but fill flash photography is sometimes useful in indoor situations, but that's a topic for another day.
The type of photography you do always dictates the characteristics of any supplementary lighting you use. Here is more on Photography Lighting Equipment.
Keep shooting. Keep learning. Keep improving.


ABOUT BRUCE LOVELACE
Bruce is the publisher of this website. He is the author of the book "Improve Your Photography Instantly." Read more on Bruce on his Bio Page. He's been known as The Traveling Photographer ever since 1994. Read more about this website.
View some of Bruce's photos on Instagram. Visit the Facebook Page. Watch him on YouTube. Bruce runs photo workshops for kids and adults, and provides one-on-one photography coaching.
Digital Photography Education Location on Google My Business

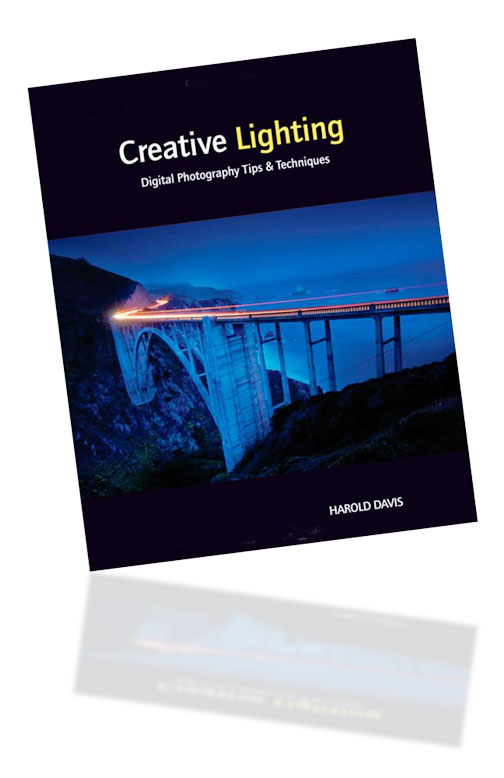 |
If you are a lighting geek like me you might enjoy this book. An overwhelming 97% of readers have given this book a 4 or 5-star rating. There is not very much on fill flash in it, but it is a very valuable tool to understand ALL aspects of lighting and lighting is the universal ingredient contained in all photographs. Click for more info: Creative Lighting |
