HOW TO POSTS: LIGHTING AND COMPOSITION
family portrait tips
How to get Sharp family portraits
WRITTEN BY: BRUCE LOVELACE
UPDATED: March 26, 2024
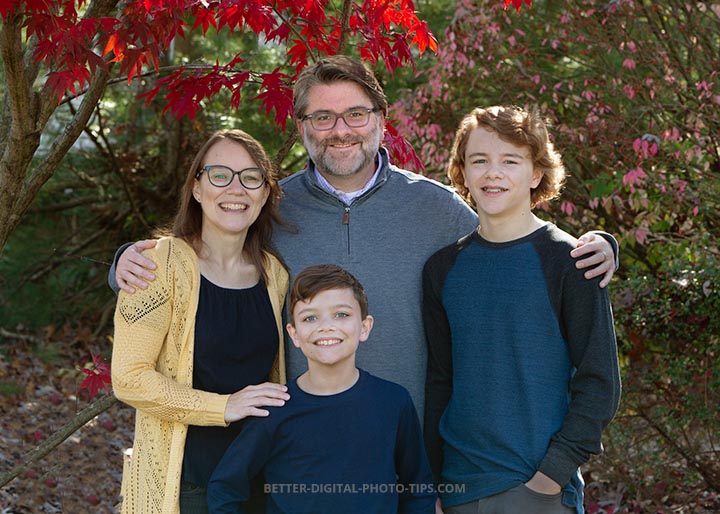 Sharp family portrait with good location and good lighting
Want to ditch the blurry family photos and capture crystal-clear memories? The secret lies in your camera settings! Before we jump into creative posing tips, let's explore the 3 essential settings that will ensure everyone is crystal clear and that your family portraits shine.
Camera Settings For Sharp Family Portraits
1. SHUTTER SPEED. Use a shutter speed # that is twice the focal length you're using. e.g. For a 50mm focal length shoot at 1/100th second.
2. F/STOP. Set your aperture 2 f/stops smaller than your lens' maximum opening. If you have an f/4.0 lens, set it at f/8.
3. ISO. Set it on auto ISO. You've decided on speed and aperture, so let your camera determine the best ISO for the correct exposure.
For a more in depth understanding on how to set camera, here's a more detailed look at camera settings.
Whether you're being hired as a professional or just being asked to be the designated family portrait photographer for a get together it's important that you know what to do ahead of time!
Let's face it, everyone appreciates it when the family portrait comes out just right. These tips will help.
This family portrait guide is for everyone. These are good ideas for everyone to use. A little planning makes everything go better than just winging it at the last second. Let's dive into the first portrait tip which you use well before the actual photo shoot happens.
1. get the details ahead of time
Find out who is going to be photographed ahead of time. Knowing the number and ages of your subjects before the day of your photography session will allow you to plan the location ahead of time. If you're shooting in the middle of the day, posing your group out in the middle of a field is not a good idea if the sun is overhead and bright.
Your location, the posing, and the time of day when everyone can gather are all affected by your subjects ages and schedules. Two year olds are not at their best for a sunset portrait on the beach when it's an hour after their normal bedtime. Teenagers don't have a lot of energy and enthusiasm early in the morning.
If you are photographing several young adults who go out partying on Friday nights, you may not get great results by scheduling a Saturday morning photography session at 9:00am. Use some common sense here. It takes most people at least 2 full hours to lose the sleepy eyes look after a good night's sleep.
2. plan your family posing before you shoot

Your posing will be quite different if you are photographing several young children or maybe a group photo of 7 adults and 2 eight year olds. You can copy my ideas on how to pose various group sizes: poses of 4 people, posing for groups of 5 people, posing groups of 6, or larger group posing on this website. to get some fresh ideas.
Sketch out a few poses on paper ahead of time or at least draw a mental picture and you will have great confidence in what you are doing the day of your shoot.
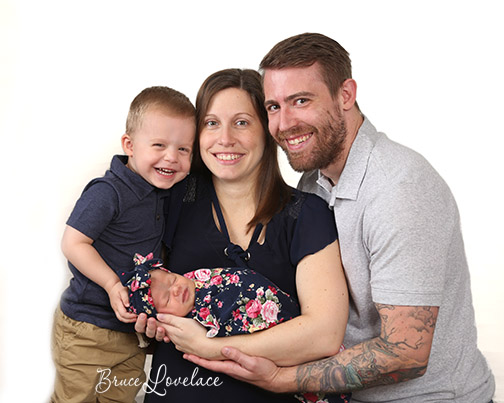
Here is a nice pose for a small family of three. Notice how the parents are angled inward and posed slightly behind the smaller child. Will you have some people standing, some sitting on stools or chairs, some kneeling or, sitting or lying on the grass?
Do you know some of the basic "rules of compositions."
3. pick the right location for portraits
Look for location where there is ample lighting. Shooting in dark areas might have a negative effect on the sharpness of your group photo because of the need for a slower shutter speed, larger lens aperture, or higher ISO setting needed to get a good exposure.
Look for location where the background that is not distracting and the lighting will be pleasing.
The convenience of having portraits taken at home makes the photography both more comfortable and personal, but can be challenging. If it's an indoor location you may have to use your camera's built-in flash or hot-shoe mounted flash. Make sure you have plenty of room. If it's a very tight, cramped area, lighting may be a challenge and your posing could suffer.
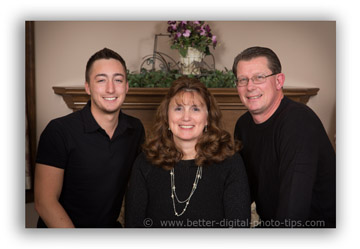
 I used studio strobes with umbrellas for sharp well-exposed subjects.
Corner of living room had the perfect background
The colors of their clothing and the decor of the room were a perfect match.
When shooting outdoors, posing subjects in a unprotected sunny locations can result in squinting subjects and harsh shadows on your subject. Refer back to the first photo in this post. The location I chose was with the family standing in the shade of a tree on a bright sunny morning.
4. The Best time for family portraits
It's critical to know how to pick the best time for family portraits. Lighting is everything when it comes to photography and the light changes dramatically as the day progresses. Picking the right time for good family portrait lighting takes observation on your part. There are several facets to it. Here is a list of things to consider with respect to timing your portrait photography.
- Look for open shade where a soft pleasing light is striking your subjects.
- Early morning is nice for lighting, but most teens and adults don't look their best until they've been awake for a few hours. It takes that long for the sleepy-eyed look to go away.
- Beach photography is best done around or just after sunset, when the sun isn't as bright, the shadows have softened, and before it gets too dark.
- Are any preschool kids or toddlers involved. You need to be aware of naptime. That's a tough time to get cooperation out of a 2 year old.
- Depending on the location, the time of year, and the time of day, most outdoor photography locations have certain situations where the outdoor lighting is much better than other times. Plan accordingly.
5. For Great family portraits plan the clothing to match
 Good Clothing Choice
Distracting Background
This is an important tip that makes a huge difference in the quality of your final photographs.
Group portraits are so much nicer when you pick matching or complimentary colors. Solids are less distracting than plaids, stripes, or patterns. Dark colors make us look thinner.
If you are planning everything else in your photograph, it's a big mistake to neglect your Portrait Clothing.
Is it formal or casual? Match the clothing choices to the environment and the pose. Unless maybe you are shooting a wedding, Suits and ties don't match with casual posing in an outdoor environment.
6. how to get sharper family portraits
The two factors that you need to pay attention to in order to make sure you have sharp family portraits are focus and motion blur. Using the image stabilization feature of your camera will help with blur from camera movement, but it won't help if your subject is moving. Use a shutter speed of 1/125 second or faster when you're shooting with a "normal" perspective lens. For telephoto lenses use a faster shutter speed. This will freeze any motion of your subjects and any movement of your camera.
Even the slightest camera jiggle or subject movement will cause some lack of sharpness, even if it's not obvious blur. I almost always use a tripod when shooting family portraits. I like the security of holding the camera still and I want to be able to watch my subjects "live" while I click the shutter, without having to hold the camera in the right position.
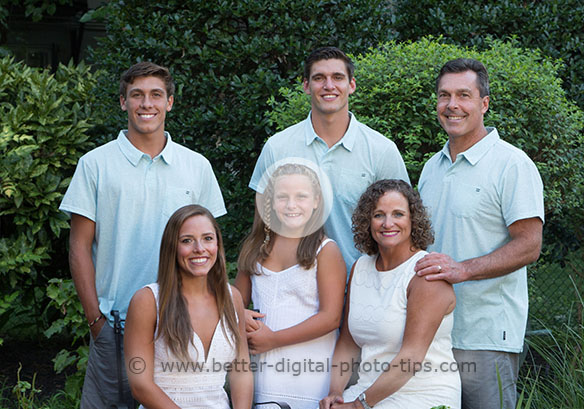 Focus about midpoint between
the nearest and farthest person from the camera
Just as important as shutter speed is, you've got to nail your focus just right, too. If you have two rows of people, focus on a spot toward the back of the front row.
The way camera optics work, you'll get more sharpness behind your focus point then you get in front of it. If you have several rows of people, try to focus on a pint that is about 1/2 of the distance into the range of closest and farthest person. Brush up on the concept of the range of things in focus called depth of field.
7. family portrait tip: shoot variety
If you have followed the first 6 portrait tips, then the 7th tip is the fun one. Get creative! In addition to the sketched out ideas, get creative and break a few composition rules. Think outside the box, and shoot some candid or non-conventional photography after the safer, traditional photos are done.
It's bonus time! This is how you grow as a photographer. This is how you expand your creativity and have some fun. Shooting a couple of unique poses will keep your clients happy too.
more resources reflating to family portrait tips
See the related post below my signature or visit my search this website page to look for more helpful information for your photography.
Keep shooting Keep learning. Keep Improving.


ABOUT BRUCE LOVELACE
Bruce is the publisher of this website. He is the author of the book "Improve Your Photography Instantly." Read more on Bruce on his Bio Page. He's been known as The Traveling Photographer ever since 1994. Read more about this website.
View some of Bruce's photos on Instagram. Visit the Facebook Page. Watch him on YouTube. Bruce runs photo workshops for kids and adults, and provides one-on-one photography coaching.
Digital Photography Education Location on Google My Business
